
How to Replace Kitchen Cabinet Base Molding

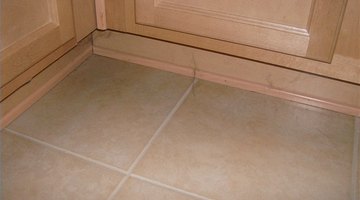
The base molding on kitchen cabinets is usually a small piece of quarter-round molding, stained or painted the same color as the cabinets, that is used to close the gap between the cabinet and the flooring.
Things You Will Need
- Cabinet base molding
- Paint or stain
- Paint brush
- Measuring tape
- Miter saw or table saw
- Pneumatic nailer
- Pin nails
Cabinet molding can be damaged by normal household activity, especially in wet areas such as the kitchen and bath, and will sometimes need to be replaced. Replacing cabinet base molding is easily accomplished with the right instructions and tools.
-
Purchase base molding the same size as the other base molding on your cabinets. If your cabinets were prefabricated, and you can purchase the base molding in the same color as your cabinets, you will not have to prepare the molding.
-
Prepare the molding for installation by painting or staining the same color as the cabinets. It is always easier to stain or paint the molding before installing on the cabinets. Allow the stain or paint to thoroughly dry before installing.
-
Measure the length of area you need to replace with a measuring tape. Pay special attention to the type of cut needed at each end of the molding. If the molding fits flat against a wall, a straight cut is all that is necessary, but if the molding connects with another piece of molding in a corner, you will need to make an angled cut for the molding to fit properly.
-
Cut the angled end of the molding first, if needed, and cut the other end of the molding a couple of inches beyond what is needed. Place the angled end of the molding in place on the cabinets and test the fit of the angle with the existing molding. Adjust the angle as necessary for a better fit. When you are satisfied with the angled cut, make the proper length cut on the other end of the molding. The easiest way to cut molding is using a compound miter saw or a table saw with a miter gauge.
-
Install the molding on the cabinet using a pneumatic nailer. A pin nailer is the best tool for the job as a pin nail has no head and is almost invisible once in place. Often homeowners find that given the location of the base molding, touch-up is not necessary when using a pin nailer because the nail holes cannot be seen unless you're within inches of them.
Warning
Always wear safety glasses when operating power tools.
Warnings
- Always wear safety glasses when operating power tools.
Writer Bio
Kaye Morris has over four years of technical writing experience as a curriculum design specialist and is a published fiction author. She has over 20 years of real estate development experience and received her Bachelor of Science in accounting from McNeese State University along with minors in programming and English.
Photo Credits
- Kaye Morris
- Kaye Morris
More Articles