Things You'll Need
Red long-sleeved spandex shirt, fitted core
Red fabric paint
Red spandex leggings
Black fabric paint
Wide canvas belt
Red acrylic paint
16 canvas button-front cell phone cases
Tape measure
1/2-inch elastic
Scissors
Needle
Thread
Black acrylic paint
White acrylic paint
Painter’s tape
Elastic
Needle
Thread
Red ski mask
Black felt
Chalk
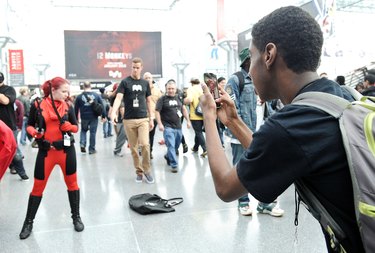
Leave the milquetoast good-guy world behind and embrace your not-so-nice side in this DIY Deadpool costume. Deadpool, the red-and-black clad persona of Wade Wilson, entered our lives as an arch villain. But two movies later, the snarky, wise-cracking "Merc with a Mouth" has come to appeal to our collective inner cynics. Create your own DIY Deadpool costume for cosplay or themed parties, and wear it with hiking boots and red gloves to complete the Deadpool look.
Deadpool’s Costume
Hide old logos
Cover any commercial logo that may be on the red long-sleeved spandex shirt with red fabric paint. Let the paint dry.
Video of the Day
Outline the Black Areas
Use painter's tape to outline the black areas of your DIY Deadpool costume. Outline the shoulders and upper arm so that the shirt looks like it has cap sleeves.
Create the Front Shirt Pattern
Add painter's tape down the front of the shirt. Tape the center side sections to create a stacked diamond-shaped pattern down the center of the shirt. The diamond shapes will remain red. Everything outside the center of the shirt will be painted black.
Paint the DIY Deadpool Costume Shirt
Paint the front of the shirt and the sleeves with black fabric paint.
Tape the Front of the Shirt
Place tape on the back of the DIY Deadpool costume shirt. Add tape lines that travel down from the shoulders and narrow at the waist, but don't allow them to intersect. Place additional tape from the waist section that widens into an upside-down V to the bottom of the shirt.
Paint the Back of the Shirt
Paint the back sides of the shirt with black fabric paint. Do not paint the center section of the shirt. Remove the tape once the paint is dry.
Outline the Rectangles
Outline two rectangular sections on the outside of the thigh area with the painter's tape. The rectangles should extend to the mid thigh, but should only cover the outside of the legs. Paint the rectangles black.
Video of the Day
Deadpool's Belt and Garter
Paint the Belt Red
Paint the canvas belt with red acrylic paint and let it dry.
Paint the Cases Red
Paint nine canvas button-front phone cases with red acrylic paint. Make sure to cover all outside areas of the phone case.
Secure the Cases to the Belt
Clip the phone cases onto the red canvas belt.
Measure, Cut, Sew
Measure your mid thigh. Cut a section of elastic equal to that measurement.
Sew the elastic ends together to create a round circle.
Paint and Finish
Paint the elastic and remaining seven phone cases black. Let them dry.
Slide the phone clips onto the black elastic.
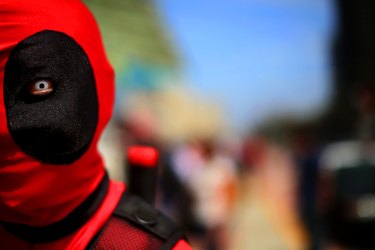
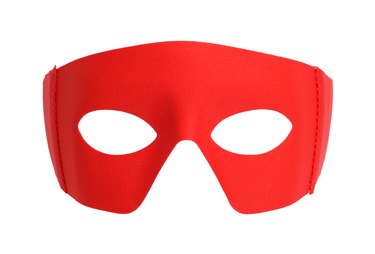
Deadpool's Facemask
Sew the Mouth Closed
Sew the ski mask mouth area closed.
Measure and Cut
Measure your face from your chin to your forehead. Take an additional measurement across your face from the outside corners of your eyes. Cut a felt oval equal to these measurements.
Fold and Mark
Fold the oval in half lengthwise. Locate the center along the folded edge. Mark it with a chalk dot.
Make the Mask Cutouts
Cut two pie shapes in the mask. Cut from the center dot outwards. One pie shape should extend upward and the other pie shape should extend downward. Make sure you leave the center piece connected. Open the shape. It should look similar to a butterfly.
Add the Mask Piece
Center the black mask piece over the eye portions of the ski mask. Sew it in place.
Finish the Mask
Turn the mask inside out. Cut away the black fabric from the eye area. Turn the mask right side out.
Tip
The button-front cellphone cases work great for faux ammunition holders, however, it is possible to replace them with a cheaper option like small painted cardboard boxes hot glued to the canvas belt.
Purchase the cellphone cases in bulk from an outlet store or thrift store.