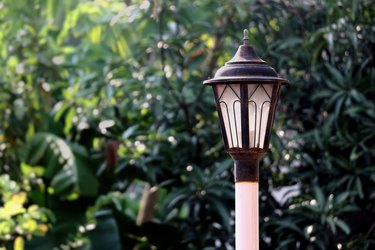
Installing an outside lamppost is an excellent way to add increased security and safety to your home. But remembering to turn on the lamppost every night is easier said than done, and using a timer means that you always have to remember to adjust it for daylight savings. By installing an outside lamppost that has a built-in light sensor, you'll never have to worry about those concerns ever again. With a light sensor controlling the function of the light, it automatically turns on when the sun goes down and turns off when it comes back up. And best of all, wiring the fixture isn't that difficult to do.
Things You'll Need
Video of the Day
How to Wire a Lamp Post With a Light Sensor
Step 1: Kill the Circuit
Turn off the circuit in the electrical panel that powers the light that's currently installed on the lamppost.
Video of the Day
Step 2: Remove the Top and Bulb
Remove the top of the light fixture by removing the bolts with a screwdriver or the finishing caps with needle-nose pliers that hold it in place. Pull the top off and remove the bulb. If the light was recently on, wait for the bulb to cool before performing this step.
Step 3: Lift Off the Fixture
Loosen the bolts on the base of the lamppost fixture with a screwdriver. These bolts are what secure the fixture to the post. Once the bolts are loose, the fixture can be lifted off the post.
Step 4: Ensure the Circuit Is Dead
Test the wires inside the post with a touch-type voltage tester before you touch any of the wires with your hands. Press the button on the tester and touch the tip of it to each wire to make sure the circuit is dead. If the tester beeps or lights up, then the circuit is still live. Try additional breakers until you find the correct one.
Step 5: Perform Wire Identification
Pull the wires out of the post until you find the wire connectors that connect the fixture wires to the feed wires. Disconnect the wire connectors to remove the fixture and bend the feed wires over the rim of the post to prevent them from falling back down inside.
Step 6: Strip the Wires
Strip any necessary insulation from the ends of the wires both on the new fixture and the wires in the post using the wire strippers.
Step 7: Connect Ground Wires
Connect the ground wire from the post to the ground wire on the new fixture with a wire connector.
Step 8: Connect White Wires
Connect the white wire from the post with the white wire on the light fixture and the white wire on the light sensor. Make sure the wire connector is on tight and wrap the connection with electrical tape to help keep the elements from getting inside the wiring.
Step 9: Connect Black Wires
Connect the black wire from the post with the black wire on the light sensor. Make sure the wire connector is on tight and wrap the connection with electrical tape to help keep the elements from getting inside the wiring.
Step 10: Connect Remaining Wires
Connect the black wire from the fixture with the red wire on the light sensor. Make sure the wire connector is on tight and wrap the connection with electrical tape to help keep the elements from getting inside the wiring.
Step 11: Return Fixture To Post
Push the wiring back down inside the post and set the fixture on top of the post. Secure it in place by tightening the bolts around its base.
Step 12: Install a Light Bulb
Remove the top of the fixture according to the manufacturer's instructions and install a properly rated light bulb. Replace the top and turn the circuit back on.
Step 13: Test the Installation
Cover the light sensor with electrical tape so no light can get through, to test the installation. In a few seconds, the light should turn on. Remove the tape and after a few seconds, the light should turn off.
Tip
Always test your tester on a circuit that you know is working before you test the circuit you are going to be working on. This is to ensure that the tester is functioning properly.
If your outside lamppost was previously controlled by a wall switch, leave the switch on all the time after installing a fixture with a built-in light sensor.
Warning
Never connect a light sensor to a live circuit, as it is not only dangerous for the individual but it could damage the sensitive circuitry of the sensor.