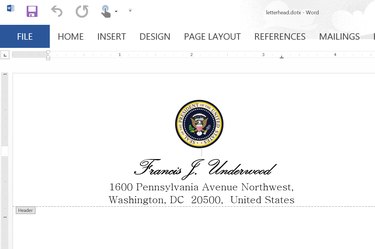
Adding a letterhead to your personal or business correspondence ensures that all your recipients will have your contact information close at hand. Letterheads usually include your name, mailing address, phone number and email address. Whether you put this in the page header, the footer, or a combination of both is a matter of personal taste. If you run a business, include your company logo.
Save your letterhead as a template file so you can use it whenever you draft a new letter. While there's nothing wrong with using plain paper with your letterhead, you may want to consider investing in a heavier, high quality paper stock for important correspondence.
Video of the Day
Video of the Day
Step 1
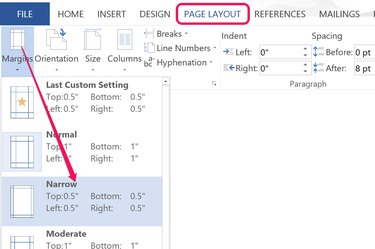
Open a new Word document. Before beginning the letterhead, specify the page margins by clicking the "Page Layout" tab and clicking the "Margins" icon.
Step 2
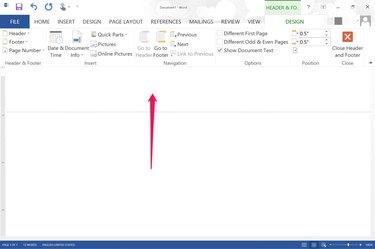
Double-click the top line of the blank document to open the page header. If you want to put the letterhead at the bottom of the document, then double-click the page's bottom line.
Step 3
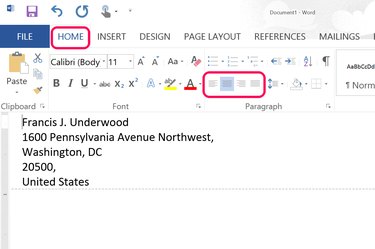
Type your name, address and any other information you want included. Whenever you press "Enter," a new line is added to the header or footer. To change the font style, font size or alignment, use the Font and Paragraph sections of the Home menu, just as you would for any text in a Word document.
Step 4
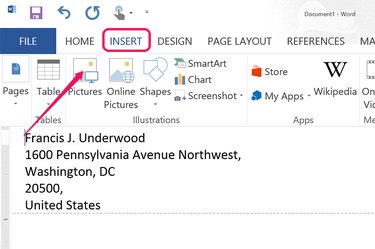
Click the "Insert" tab to add an image like a company logo and then click the "Pictures" icon in the Ribbon. Word accepts most image formats, including PNG images with transparent backgrounds.
Step 5
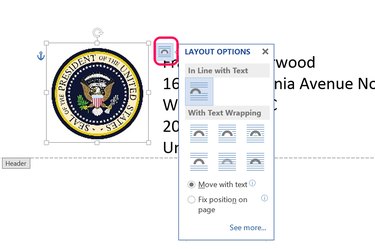
Drag the corner of the image to resize it. To align the image beside or above the text, click the "Layout Options" button that appears near the inage's upper-right corner and select "In-Line With Text."
Step 6
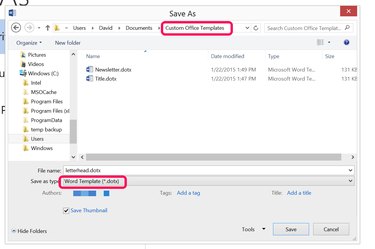
Click the "File" menu when your letterhead is complete and select "Save As."
Double-click "My Computer" or "OneDrive." When the Save As dialog box opens, type "letterhead" in the File Name field. Click the "Save As Type" menu and select "Word Template (*.dotx)." Word automatically changes the file location to the "Custom Office Templates" folder.
Step 7
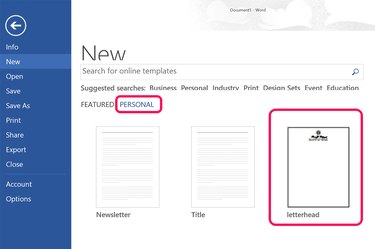
Create a new document from the template by clicking the "Personal" option when you launch Word, or after you select "New." When you click the "letterhead" icon, it opens as a new Word document file.
To create a template for envelopes, change the document size using the Page Layout tab options and adjust the size and position of the header.