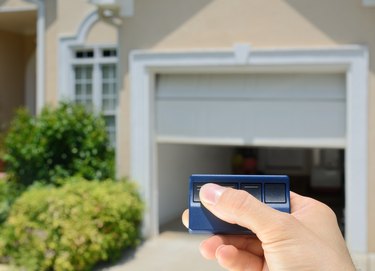
The Genie Intellicode garage door opener system includes both portable remote controls and also keypad controls that may be mounted on an exterior wall of your garage. The Intellicode system is Genie's most recent technology, offering great security by changing a digital code signal each time you open the door. This makes it virtually impossible for the system to accidentally share the same code as a nearby garage door and also makes it impossible for anyone to record the code in order to gain access to your garage without your permission.
Intellicode keypad entry devices work in the same way, but there are situations in which you'll want to reprogram the code you type into the keypad. For example, if you have moved into a new house equipped with an Intellicode opener, you will almost certainly want to reset the keypad sequence.
Video of the Day
Video of the Day
How you do this will depend on which model of keypad you have. There are three models of Intellicode keypads, and they may have different methods of programming depending on what version of Intellicode door opener is mounted in your garage. Read the following instructions carefully to determine which instructions apply to you.
Intellicode Keypad Model #1
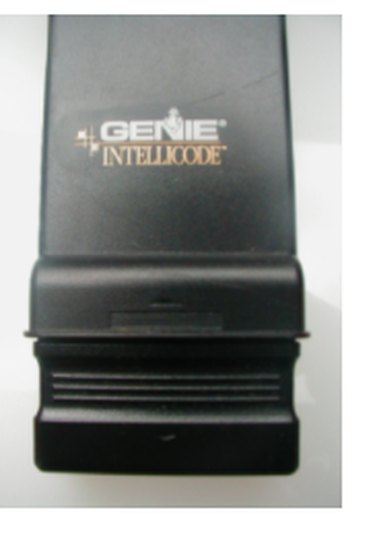
Model 1 keypads are black with a slide-up cover and the word "Intellicode" printed on the cover. They include opener models GWKIC and ACSDG. There is a two-part process for programming a new code.
Part 1
- Open the Genie Intellicode keypad cover halfway. Press the PROG and 8 buttons simultaneously and hold them down. The indicator light should blink once, alerting you that your wireless keypad is ready to be programmed.
- Keep the cover open and enter 3, 5, and 7 on the keypad. Press the PROG button and watch for the light to begin blinking once per second.
- Enter your personal identification number (PIN).
- Press the PROG key. The red light will now blink quickly.
- Close the cover fully and progress to Part 2.
Part 2
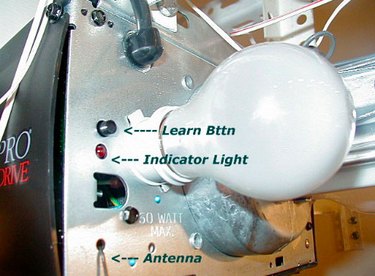
- Gently press and release the LEARN CODE button on the housing of your Genie garage door opener (the motor unit mounted on the ceiling). This small black button is located behind the light bulb cover, near the antenna wire that protrudes from the unit. When pressed, a radio signal indicator will start blinking red for 30 seconds.
- Immediately enter your PIN number while the motor head indicator light is blinking.
- Press SEND two times for your system to grab your frequency and code it in.
- Press SEND once more to test the system and start your door moving.
Adding More Doors
If your garage has more than one door you want to operate from the same keypad, here is the process for adding more doors:
- Open the cover fully. Enter PIN 1.
- Press the PROG button three times.
- Enter the total number of doors on the keypad (2 or 3)
- Press PROG.
- For each door opener, press the operator LEARN CODE Button.
- Enter PIN 1.
- Press SEND.
- Enter Door Number (1, 2, or 3).
- Press SEND three times.
- Close the cover.
- Test by opening the cover; then enter PIN1.
- Go to next the next door opener and repeat steps 8 through 12.
Intellicode Keypad Model #2
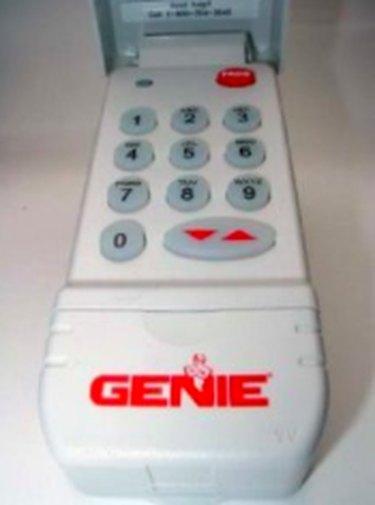
Type 2 keypads are white with a flip-up cover. This is model GWKP. There are two sets of steps to programming a new code into this type.
Part 1
- To erase the old PIN, press and hold down, in order, the PROG, 6, and UP/DOWN arrow keys. The red LED will blink once and then turn off. Release the buttons.
- To program the keypad, press the following keys in order without holding them down: 3, 5, 7, and PROG keys.
- Enter your chosen PIN, which can be anywhere from three to eight characters.
- Press PROG again — the red LED light will blink twice per second and then turn off.
Part 2
- Find the LEARN CODE button and the LED indicator light on the motor unit. It is usually behind the light bulb cover, close to the antenna wire. If your door opener does not have an antenna, you have an external receiver, which will require you to remove the cover to find the LEARN CODE and LED light.
- Gently press and release the LEARN CODE button. The red LED indicator light will start to blink and will blink for up to 30 seconds.
- While the LED light is blinking, enter your PIN and press the UP/DOWN arrow key on your keypad. The LEARN CODE indicator LED will stay on.
- Press the UP/DOWN arrow key again. The LEARN CODE indicator LED will turn off. Wait until the keypad backlight turns off (approximately 30 seconds).
- Test by entering your PIN into the keypad and pressing the UP/DOWN arrow key to operate your door.
Adding More Doors
All garage doors will use the same PIN for GWKP models:
- Enter PIN and press PROG (red LED blinks once per second).
- Press PROG again (red LED blinks twice per second).
- Press the number of doors you wish to control (2 key or 3 key).
- Press PROG (red LED blinks several times and turns off).
- Decide which door will be door #1, #2, and #3.
- Press the LEARN CODE button on the motor unit.
- Enter your PIN and press the UP/DOWN key on the keypad.
- Press the number you have picked for this door opener (key 1, 2, or 3).
- Press the UP/DOWN key.
- Repeat steps 6 through 9 for each door opener.
Intellicode Keypad Model #3
The model #3 keypad is the GK-BX, which will work with Genie systems using either type 1, type 2, or type 3 controls. Intellicode 1 refers to all systems made from 1995 to the present, with the exception of 2011 and 2012. Intellicode 2 refers to most units made in 2011 and 2012.
For Type 1 Controls
Note: To clear out factory or previous program settings, press and hold both the program key and the UP/DOWN arrow key until the light flashes twice and goes out.
- Press keys 3, 5, and 7 in order.
- Press the PROGRAM key.
- Enter your PIN ( from three to eight characters).
- Press the PROGRAM key.
- Find the LEARN CODE button and the LED indicator light on your Genie motor unit inside the garage. It is usually behind the light bulb cover, close to the antenna wire. If your door opener does not have an antenna, you have an external receiver, and you'll need to remove the external receiver cover to find the LEARN CODE button and the indicator LED light.
- Open and enter the PIN; then press and release the UP/DOWN arrow key several times to activate the door.
- Once your keypad is programmed, to change the PIN number, enter your current PIN; then press PROGRAM, enter your new PIN, and press PROGRAM again. The keypad should now be set to the new PIN.
For Type 3 Controls (Opener Systems Built From 2009 Until July 2011)
- Press keys 3, 5, and 7 in order.
- Press the PROGRAM key.
- Enter your current PIN.
- Press the PROGRAM key.
- Find the LEARN CODE button and the LED indicator light on your Genie motor unit inside the garage. It is usually behind the light bulb cover, close to the antenna wire. If your door opener does not have an antenna, you have an external receiver, and you'll need to remove the external receiver cover to find the LEARN CODE button and the indicator LED.
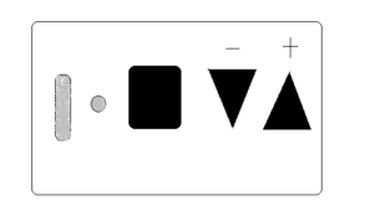
- Press and hold the square PROGRAM button located on the bottom of the motor unit, until both the round and cylindrical LEDs turn blue.
- Release the button. Only the round LED will be blue. (Note: If the round, blue LED turns off and the long, purple light starts blinking, go to the instructions for Intellicode 2 below.)
- Press the square PROGRAM button and release again. LEDs should blink purple.
- Use an existing remote to unlock the system by pressing it once only.
- On the wireless keypad, enter your PIN and press the UP/DOWN arrow key 3, 4, or 5 times until the door activates.
- Wait 30 seconds until the LED turns off.
- Test by entering your PIN and pressing the UP/DOWN arrow key once.
Intellicode 2 (Openers Built From July 2011 to Present)
- Press keys 3, 5, and 7 in order.
- Press the PROGRAM key.
- Enter your PIN ( from three to eight characters).
- Press the PROGRAM key.
- Find the LEARN CODE button and the LED indicator light on your Genie motor unit inside the garage. It is usually behind the light bulb cover, close to the antenna wire. If your door opener does not have an antenna, you have an external receiver, and you'll need to remove the external receiver cover to find the LEARN CODE button and the indicator LED.
- Press and hold the square PROGRAM button (shown in the diagram above) located on the bottom of the motor head, until the round LED turns blue and release the button.
- Upon releasing the square button, the blue light will turn off and the long purple button will start to blink.
- While the purple light is blinking (30 seconds), go to the keypad, enter the new code you programmed into the keypad, and slowly press and release the UP/DOWN arrow key several times until the door activates.
- Test by entering the PIN and pressing the UP/DOWN arrow key once.
Changing Existing Code (PIN) to a New Code
- Enter the existing PIN (personal code) and press the PROGRAM key.
- Enter the new PIN and press the PROGRAM key.
- Wait for the backlight to go out on the keypad.
- Test by entering the new PIN and pressing the UP/DOWN arrow key.