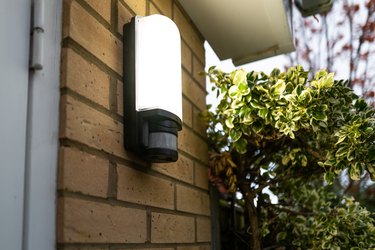
Light fixtures that operate via sensors are a great way to light outdoor spaces for a low cost. Since they are continually exposed to the elements, these sensors may at times require maintenance or replacement. Fortunately, this is a simple process that will have your outdoor light fixture working again in no time.
How Do Light Sensors Work?
Video of the Day
A photocell, or photoelectric cell, provides the power behind a light sensor. Photocells harness the energy of the sun and convert it to direct current, a form of electricity. When you have a walkway lantern or garage light that runs on photocells, they absorb the sun's energy throughout the course of the day. When the sun sets, the light operates using the DC current it generated while the sun was out. The sensor uses changing light levels to know when to turn on and off.
Video of the Day
Replacing a Light Sensor
To replace a light sensor on a fixture, first read the owner's manual or instructions that came with your fixture. If a specific kind of sensor is best, you will need to find it at a home improvement store or similar location. If you do not have a manual, your fixture should require a sensor of the same wattage as the one you are replacing. You can unhook your circuit and then check the light sensor to determine its wattage.
To get started, disconnect or switch off the circuit at its starting point. This is an important step for safety reasons. There should be no electric current running to the light during your repair. If you still need to check the light sensor for its wattage, do so now.
Remove the fixture from its post by unscrewing the light bulb, removing any screws and pulling the fixture free. Set the screws and bulb aside in a safe location. You will need them again after your repair.
You will need a no-contact voltage tester to check the voltage of your fixture. Press the button on the tester to each of the wires of your light sensor. If the sensor beeps or lights up, your circuit is still live, and you will need to disconnect it. Do not skip this step, as it is critical for your safety.
Locate the light sensor and disconnect its wires from the wires attached to the wall. Using needle-nosed pliers to get started, unscrew the sensor. Next, place your replacement light sensor over the hole. Screw the new sensor into place. Connect the white wire of your new light sensor to the white wire of the fixture. Use electrical tape and a wire connector to attach the two wires. Repeat this step for the black and red wires on your light sensor and fixture.
Gently push all wires back into their original locations and replace the outer housing of your light fixture. Once you replace the light bulb and fixture cover, it is safe to turn your power back on. If you flipped a circuit breaker, you may return it to the on position.
To test your new light sensor, use tape to block out any daylight. The sensor should then turn the light bulb on. Once you remove the tape, your light should then turn off. Regular cleaning and testing of your light fixture and sensor can assist with its longevity and alert you to potential issues more readily.