
Installing Air Conditioner Aluminum Windows

Air conditioners are installed in all types of windows. These window unit air conditioners are used to cool rooms that are warm in the summer months. They are also used in houses that do not have central air conditioning. Window units are installed directly into the window. The process is the same whether the window is aluminum, wood or vinyl.
-
Open the window. Go to the window on the outside of the house. Center the L-bracket along the bottom of the window. Screw the bottom side of the L-bracket into place below the window sill with sheet metal screws. Connect the top side of the bracket directly to the window sill with sheet metal screws. Screw through the provided holes and straight into the bottom of the window to connect the top bracket.
-
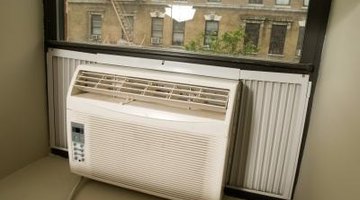
Set the air conditioner onto the window sill from the inside of the house and close the window so it is snug on top of the air conditioner. Move the accordion panels on the air conditioner to cover the openings on each side. Close the window to hold the air conditioner in place.
-
Secure the accordion panels to the window frame along the upper sash of the aluminum window with sheet metal screws and a drill. Drill and install screws through the provided holes in the frame of the air conditioner along the top of the unit. Install screws into the frame along the sides and at the bottom of the air conditioner to further secure it in place.
-
Fill the gap between the window and the lower sash with a strip of foam insulation. The gap is located between the bottom window sash that has been raised to make room for the air conditioner and the top window panel. Stick the insulation down into the opening to help seal the gap.
-
Plug in the air conditioner and turn it on. Adjust the settings and make sure it cools the room.
References
Writer Bio
Alexander Callos began writing in 2005 for "The Lantern" at The Ohio State University and has written for various websites, including Bleacher Report, Top Ten Real Estate Deals and Columbus Sports. He has published articles for CBS Sports, SI.com and other websites. He graduated in 2007 from The Ohio State University with a bachelor's degree in public affairs journalism.
Photo Credits
- Jupiterimages/Photos.com/Getty Images
More Articles