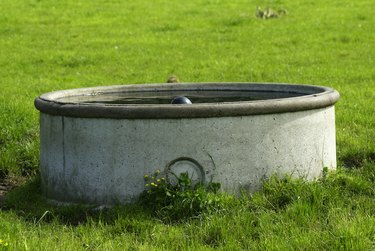
A concrete water tank can develop cracks over time. Your tank's cracks may have been created from soil shifting beneath the tank, or perhaps from the freeze-thaw cycle expanding and contracting the concrete during extreme weather conditions. Regardless of the reason, these cracks can cause your tank to leak. Not only will a leak drain away the water contained in the tank, it may also allow bacteria to build in the crack, making the water unsafe for use. When a crack develops, you can quickly repair it using a patch created of hydraulic cement, or with a combination of cement patch and liner.
Things You'll Need
Wire brush
Chisel
Hammer
Water
Bucket
Electric drill
Trowel
Paint roller
Tank liner
Liner anchors
Video of the Day
How to Repair Concrete Water Tanks
Step 1: Measure the Tank
Repair tanks holding drinking water by first measuring the tank, noting both the circumference of the tank as well as the tank depth. Order a tank liner from a liner manufacturer to the dimensions needed. Make sure you order a liner rated as food-grade level rubber.
Video of the Day
Step 2: Clean the Tank
Drain the tank completely and clean out the crack, removing any dirt or debris with a wire brush. Remove any loose concrete that may be located around the crack with the chisel. Take care not to chisel directly into the crack though, as this could spread the crack.
Step 3: Add Concrete Bonding Agent to Crack
Brush a layer of concrete bonding agent into and surrounding the crack, making sure to cover the entire inner surface of the crack. Wait about five minutes for the agent to dry to a point where it's no longer wet but remains tacky to the touch.
Step 4: Combine Cement with Water
Mix one part hydraulic cement with three parts water in a bucket using the electric drill with mixer paddle attached. The cement should be a moist, dirt-like consistency, and stick together when rolled into a ball without leaving cement residue sticking to your hands. Use the trowel to press the cement into the crack, filling it completely. Scrape over the surface of the cement with the tilted edge of the trowel to make it even with the surrounding concrete. Remove any excess cement and allow the patch to dry for an hour. This is all that is necessary for tanks not used for holding water for consumption.
Step 5: Line Tank with Epoxy
Coat the entire interior of the concrete water tank with epoxy to serve as an adhesive for the liner. Roll the resin onto the concrete using a paint roller.
Step 6: Add the Tank Liner
Install the liner in the tank's interior starting at the center of the tank. Place the center of the liner in the tank's center, pressing firmly on the liner so it adheres to the concrete. Unfold the liner, spreading it across the bottom of the tank and then extending it up the sides of the vessel.
Step 7: Wait for Tank to Dry
Drill holes into the concrete where the steel reinforced holes on the liner's edges are located using the hammer drill. Inject epoxy into the concrete holes to help hold the liner anchors in place and then pass the anchors through the steel reinforced liner holes into the concrete holes to hold the liner in place. Allow the epoxy to dry completely for the length of time specified by the manufacturer before refilling the tank.