If you keep names and addresses in a Microsoft Excel spreadsheet, it's easy to export that information into another program like Microsoft Word for easy address label printing.
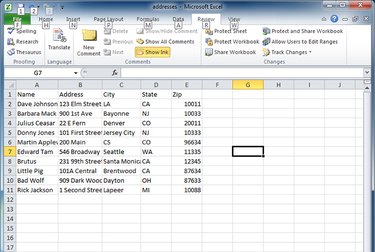
Before you begin, make sure that you have your database of addresses stored in an Excel file. It should be organized with your headers in Row 1 so they look like this (one entry per cell):
Video of the Day
Video of the Day
Name, Address, City, State, Zip Code
Then all of your addresses should follow underneath, in rows 2 and onward. Make sure there are no empty rows or columns.
To actually create the labels, you'll need to use another program, like Microsoft Word. There are many ways to do this, but we'll show you the simplest approach.
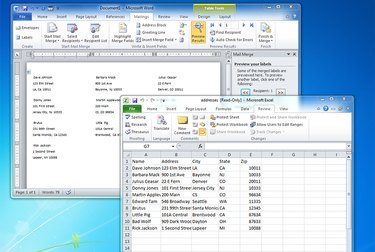
Step 1: Start the Mail merge Wizard
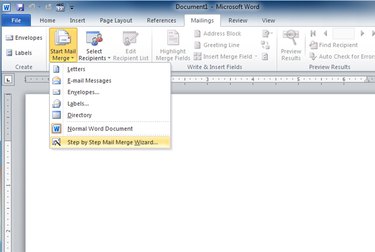
Start Word and, in a new, blank document, click the Mailings tab and then choose Start Mail Merge, Step By Step Merge Wizard. From this point forward, you'll create the labels by following the wizard's instructions.
Step 2: Choose to print labels
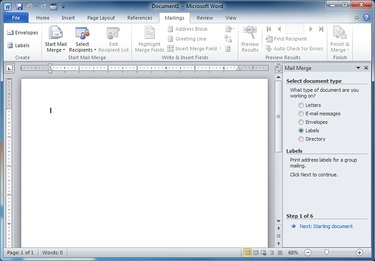
In Select document type, choose Labels and then click Next (at the bottom of the screen)
Step 3: Select the brand of labels you're printing on
In Change document layout, choose Label options... and choose the kind of address label you plan to print on. For example, if you have a box of Avery address labels, choose Avery from the Label vendors menu, and then find the right product from the (rather long) list. When you've made your selection, click OK and then click Next.
Step 4: Select the Excel spreadsheet
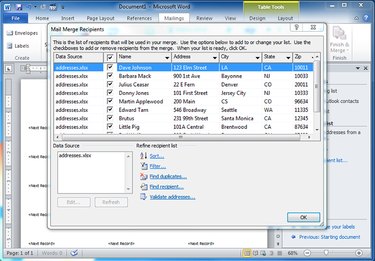
In Select recipients, choose Use an existing list and then click Browse. Find your Excel spreadsheet and select it. Click OK to accept the first sheet in the spreadsheet, and then click OK to choose all the addresses. Click Next.
Step 5: Insert the address
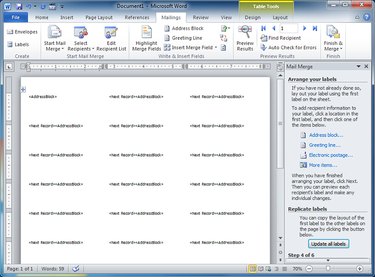
In Arrange your labels, click Address block... and click OK. This inserts the address block in the first address label on the page. Then click Update all labels to replicate it throughout the page. Then click Next.
Step 6: Preview the address labels
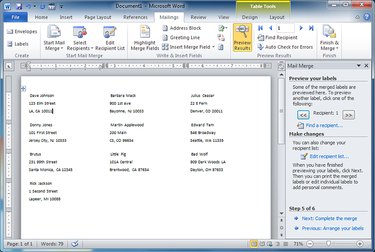
On this page you should see a preview of all the addresses on the page. Click Next.
Step 7: Print
Finally, click Print and follow the print steps to print your address labels.