Things You'll Need
Cutting mat
Quilting cotton fabric
Quilting ruler (two recommended)
Rotary cutter
Iron
Sewing machine
1/4-inch sewing machine foot (recommended)
Thread
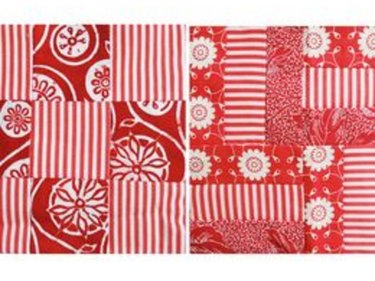
Strip quilting is a method that lets you piece quilt tops faster and easier. Rather than piecing each individual unit, you sew strips together and then cut them into units you then piece into blocks. This technique can be used to create a variety of different patterns, including the Rail Fence and Nine-Patch blocks shown here. The size and number strips needed depends on the size and type of quilt you're making.
Step 1
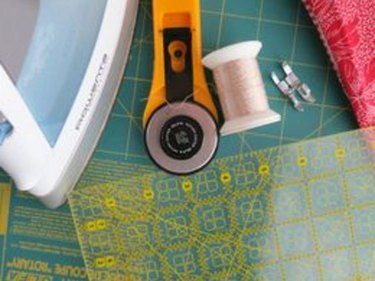
You will need basic quilting supplies – cotton fabric, complementary thread, a rotary cutter, cutting mat, and clear acrylic rulers. The fabric yardage required depends on the size and type of quilt you're making. Please see the last slide for an itemized list of tools and materials.
Video of the Day
Step 2
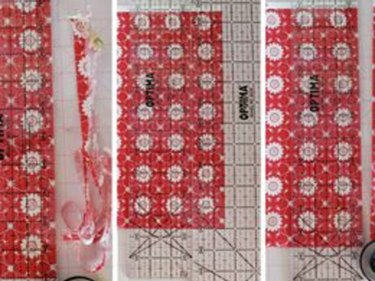
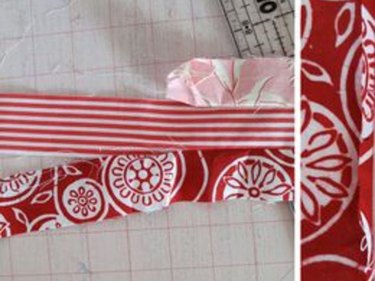
Cut your strips as accurately as possible. Fold your fabric selvedge to selvedge, making sure that your grainline is straight and there are no wrinkles in your fabric. Trim the selvedge edges and cut your strips. (In the example shown here, I cut 2-1/2 inch strips, which is fairly common in strip quilting.)
Step 3
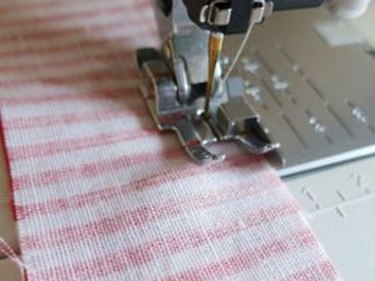
Stitch two strips together, using a 1/4-inch seam allowance. Keep your seam allowances accurate and consistent. If you don't have a 1/4-inch foot, mark a line on your sewing machine's throatplate, 1/4 inch from the center of the needle.
Step 4
Avoid stretching or distorting the strips as you sew. Don't pin the strips together, as pins can distort the fabric. If your strips are the same length, mark the center of each strip with a fabric pen or chalk and match the marks as you guide the strips toward the presser foot.
Step 5
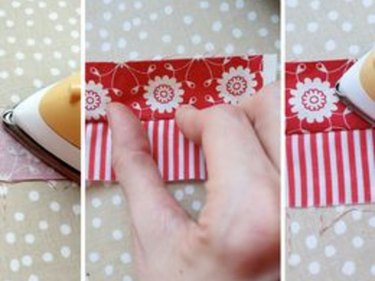
Finger press each seam open with the bulk of the fabric pointing towards the darker colored fabric. Press again with a dry iron. Don't use steam -- it can distort the fabric.
Step 6
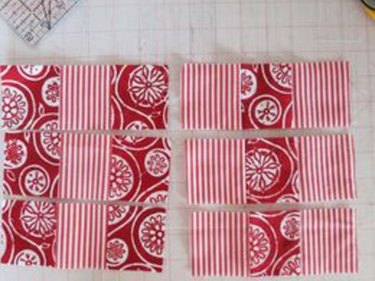
To make Nine Patch blocks, cut three strips each of two different colors. Sew one set of strips with Fabric 1 -- Fabric 2 – Fabric 1 and a second strip with Fabric 2 – Fabric 1 – Fabric 2. Cut the strip sets in horizontal units the same width as the individual strips. For example, if you are using 2 1/2-inch strips, cut the strip sets into 2 1/2 units.
Step 7
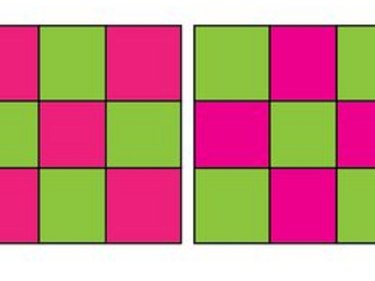
To finish the Nine Patch blocks, sew together three of the stripped units, alternating the placement of fabrics as shown here. Press the finished block.
Step 8
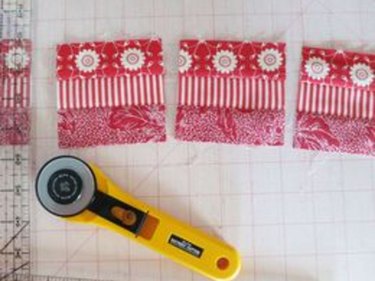
To make Rail Fence blocks, you need three different fabrics. Cut strips to create the size of square you want. For example, if you cut 2 1/2-inch strips, each three-strip unit will be 6 1/2-inches wide, and you can then cut it into 6 1/2-inch squares.
Step 9
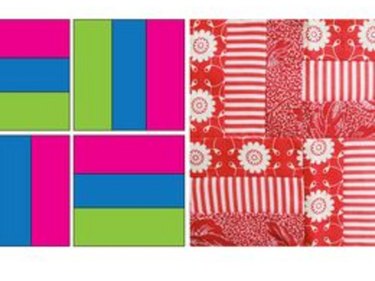
To finish the Rail Fence blocks, sew four stripped squares together to make a block, rotating the position of the stripes as shown here. Press the finished block as described in Step 5.
Video of the Day