


Pointillism art is a series of small dots, in a variety of colors, strategically placed to create an image. Up close, viewers can see the individual dots, but from a distance, the dots blend together to create a recognizable picture. The pointillism technique isn't extraordinarily difficult to master, and elementary, middle and high school students can understand the concept, as well as create masterpieces made up of hundreds of colored dots.
Teach Students About Pointillism
Gather several examples of pointillism art to show the students. Ask them to look at the pictures up close so they get a good idea of how the dots are the backbone of this style of art. Then have the students view the images from a distance so they understand that the goal of pointillism is to create a picture. Georges Seurat and Paul Signac are among the most well-known pointillism artists, and students of any age can view artwork from these artists and learn a bit about their lives.
Gather Your Supplies
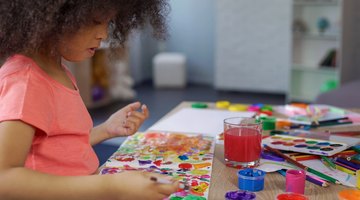
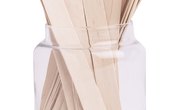
Heavy paper or canvases provide the base of the artwork. Pencils will help students outline their image before they start painting. Because students will create pictures using dots of color, paint brushes aren't the most appropriate tool. Cotton swabs allow the student to dip the end into the paint and press it onto the paper, leaving a small, appropriately shaped dot behind. While paint is the most common medium for pointillism, your students can use crayons, markers or small circular stickers for different effects.
Demonstrate How It's Done
Show the students how to pencil in an outline of the image they've chosen to create. For example, if a student wants to create a picture of a dog, she can outline the head, ears, face, body, legs and feet in pencil, then cover the pencil line with a line of black or dark brown dots. The student can fill in the darker outline with lighter brown dots or dots in various shades to give the image more depth. Demonstrate how to dip the cotton swab into the paint and press it onto the paper, reminding the students to leave just a small dot behind, not using too much paint or pressing too hard on the paper.
Practice, Practice, Practice
The tricky part of pointillism art is placing the dots in the appropriate spots so the finished product reveals an image. Students will likely need to practice their technique several times. Once the children get the hang of placing their dots, talk about color mixing. For example, if a student places a blue dot and a yellow dot next to each other, it will look green from a distance. Let the students choose which of their pointillism masterpieces is their favorite, hang them up and invite parents to a viewing of the paintings.
Related Articles


References
Writer Bio
Sara Ipatenco has taught writing, health and nutrition. She started writing in 2007 and has been published in Teaching Tolerance magazine. Ipatenco holds a bachelor's degree and a master's degree in education, both from the University of Denver.