While Windows 7 comes preinstalled with Internet Explorer 8 -- certain OEM systems may ship with Internet Explorer 9 or 10 -- you can upgrade to Internet Explorer 11 through automatic or manual updates. To go back to the version of Internet Explorer that the operating system came with, downgrade the application by removing the Internet Explorer 11 update package. You can't, however, go back to a version of Internet Explorer that the operating system didn't originally ship with.
Step 1
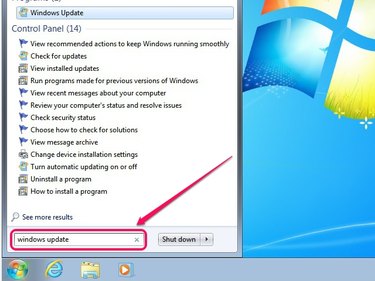
Enter Windows Update into the Start menu, and then press Enter.
Video of the Day
Step 2
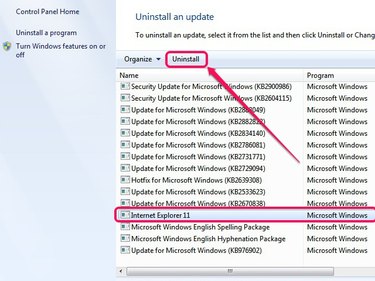
Click Installed Updates on the Windows Update applet.

Step 3
Select Internet Explorer 11 -- or Internet Explorer 10 or 9, depending on your currently installed version -- from the list of installed updates, and then click Uninstall.
Step 4
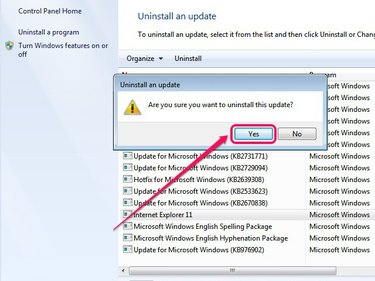
Click Yes on the confirmation pop-up box to proceed.
Step 5
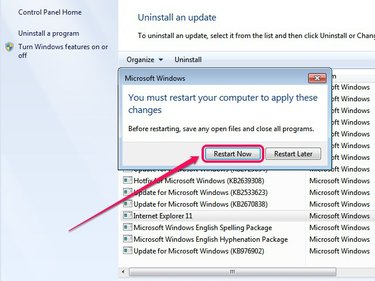
Select Restart Now to apply the changes. Once Windows 7 restarts, Internet Explorer reverts to the pre-installed version.
Video of the Day