
Solar panels convert energy from the sun using wafer-based silicon to produce electricity. Making a solar fan is ideal for cooling a garage, hot attic, recreational vehicle or any other small-sized space–wherever you need to feel a breeze. Alternatively, you can customize the system as your needs grow to add more panels and a bigger fan. All the fan parts can be bought from your local electronics store.
- 6-watt, 12-volt solar panel
- Circuit box or any enclosure
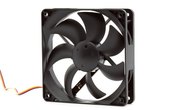
- 12-volt, 0.25A computer fan
- Large 25-volt capacitor
- Wire
- Solder
- Soldering iron
- Hot glue gun
- Hand or jig saw
- Protective eye wear
Always wear eye protection when soldering
Connect the red (positive) wire on the 12-volt fan to the positive side on the capacitor and to the red (positive) wire on the panel by soldering each connection point.
Connect the black (negative) wire on the 12-volt fan to the negative side on the capacitor and to the black (negative) wire on the panel by soldering each connection point. The solar panel will power the fan, and any extra power will be temporarily stored in the capacitor, like a small battery. When there is a shadow over the panel, the stored power in the capacitor keeps the fan going.
Cut a hole in the lid and base of the box with a hand or jig saw the size of the fan. Any enclosure can be used.
Align the fan in the opening, hot-glue it around all sides and then hot-glue the capacitor next to the fan.
Things You'll Need
Warnings
References
Warnings
- Always wear eye protection when soldering
Photo Credits
Hot glue gun isolated image by Marek Kosmal from Fotolia.com