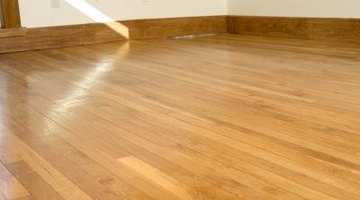
How to Install Pergo Snap-Lock Flooring
Pergo laminate flooring, a product of the Swedish flooring company of the same name, is noted for its durability and ease of installation. Pergo laminate flooring touts a dual-locking installation system, which literally makes it a snap to install. It takes about a day to install Pergo flooring in a 12-by-12-foot room. Does this Spark an idea?
Things You'll Need
- Hammer
- 3-foot measuring level
- Flooring leveling compound
- Pergo laminate flooring planks
- Hand saw
- Floor vacuum or broom and dustpan
- Polyethylene 6 millimeter (0.15 mm) plastic sheeting
- Utility knife
- Foam underlayment
- Pergo brand spacers
- Measuring tape
- Table saw
- Tapping block (or a small 2-by-4 piece or scrap wood)
- Pry bar
- Quarter-round molding
- Finishing nails
Instructions
-
Prepare the Work Area
-
1
Remove the carpeting, pad and tackless strips, if applicable. Pergo flooring can be installed over most existing subfloors except carpeting and wood flooring over concrete. Remove any nails or tacks, or hammer them firmly into the subfloor.
-
2
Check for gaps or dips in the subfloor. Use the measuring level to check the floor, looking for gaps. Gaps in the subfloor lower than 3/16 of an inch must be filled with a leveling compound.
-
-
3
Undercut the framing around doors: Lay a Pergo laminate flooring plank upside down next to the framing. Use the hand saw to saw off the bottom of the framing, using the plank as a guide.
-
4
Remove any old quarter-round molding along the wall perimeter. You do not need to remove the baseboards.
-
5
Clean the floor thoroughly with the vacuum or broom and dustpan.
-
6
Place the boxes of Pergo flooring in the room where they will be installed. Open the boxes and allow them to acclimate to the environment for at least 48 hours (96 hours for very dry or very humid areas).
Install the Flooring
-
7
Unroll the polyethylene plastic sheeting, if you are installing over a concrete floor. Overlap the sheeting sections 8 inches at the seams and cut it with a utility knife.
-
8
Unroll the underlayment and spread out the first section at the far end of the room (perpendicular to the plastic sheeting, if you installed it). Do not overlap or tape the underlayment pieces together. Do not unroll and lay out the underlayment for the entire floor; unroll the sections as you install the planks.
-
9
Make sets of spacers. Each should have two spacers together, thin side to thin side. Place the sets along the perimeter of the room, every other foot or so, to allow for the required quarter-inch expansion space. Pergo recommends that you use one spacer for every square foot of the installation area.
-
10
Start installing planks at a corner of the room. Determine how many planks will cover the first row evenly by measuring the width of the row (from wall to wall) and dividing this figure by the length of a plank. This will ensure that you do not end up needing to cut an extremely short plank for the end of the row.
-
11
Lay the first plank on the floor, with the tongue facing the wall. Maintain quarter-inch expansion space from the wall and the plank.
-
12
Use the table saw to saw the second plank in half. Lay the cut side to face the wall. Insert the tongue of the second plank at a 45-degree angle into the groove of the first plank. Slowly but firmly lower the second plank until the second plank snaps into the first plank. Apply downward pressure to keep the tongue in the groove, if necessary.
-
13
When the boards are secured together, place your tapping block on the length-wide side of the second plank. Lightly tap the block to ensure a tight seal of the tongue in the groove.
-
14
Place a third plank beside the first plank in the first row, and snap the tongue of the third plank into the short-end side of the first plank. Keep the quarter-inch expansion space between the planks and the wall. Place your tapping block on the open short-end side of the plank. Lightly tap the block to ensure a tight seal of the tongue of plank three in the groove of plank one.
-
15
Place the fourth plank beside the short end of the second plank in the second row, and snap the tongue of the fourth plank into the groove of the second plank. Place your tapping block on the open short-end side of the plank. Lightly tap the block to tighten the connection.
-
16
Grab the fourth plank--which is now connected to the short end of the second plank--and carefully tilt the two connected planks at a 45-degree angle. Slide the long end of the fourth plank tongue into the long end grooves of the first and third planks in the first row. Snap down. Place your tapping block on the open short-end side of the plank. Lightly tap the block.
-
17
Continue to install the rest of this section in this zigzagged, staggered pattern between the two rows. Continue to maintain quarter-inch expansion space against the walls, and tap every joint with the tapping block.
-
18
Repeat Steps 5 through 10 for every row, laying down a new section of foam underlayment as necessary. When you have reached the end of the installation area, use the pry bar to insert the tongue of the plank into the groove of the other planks. Use the tapping block to connect the planks tightly together.
-
19
Measure around any openings in the floor, such as heat registers, and cut the laminate planks around them to fit.
-
20
Remove the spacers from the perimeter of the room.
-
21
Measure the quarter-round molding to install along the perimeter of the room to cover over the expansion gaps. Nail the molding into place, being careful to nail through into the subfloor or the existing baseboard and never into the laminate flooring.
-
1
Tips & Warnings
You'll be on your knees a lot during this project; wearing knee pads will keep you more comfortable.
Spare laminate planks can be used as spacers around the perimeter of the room.
It helps to draw out a diagram for the first few rows of planks.
Distribute each row of planks evenly so you don't end up with one very thin plank strip installed at the end of a row.
Do not install Pergo laminate flooring on a concrete floor that emits moisture vapor more than 5 pounds per 1,000 square feet every 24 hours. Consult a contractor or purchase an anhydrous calcium chloride test kit; see the Resources listing for how to obtain such a kit and how to conduct the test.
If your planks have plastic tongues installed on the edges, remove them before sawing the planks lengthwise. Cut the plastic tongue with your utility knife to the correct measurement, and reinsert into the plank.
References
Resources
- Photo Credit texture of wooden floor - can be used as background image by Elnur from Fotolia.com