
How to Make a Cement Ball Water Fountain

Water fountains add to the visual and auditory ambiance of your garden or patio. The sleek elegance of a cement ball water fountain contributes to modern and contemporary landscaping styles without detracting from the rest of your decor.
Things You Will Need
- 17-inch plastic flower pot
- Duct tape
- Joint compound
- Inflatable plastic ball, 8 inches in diameter
- 3-inch cardboard ring
- Penknife
- Rag
- Cooking oil
- 60-lb. bag of concrete mix
- Wheelbarrow
- Concrete colorant
- Hoe
- 1/2-inch PVC pipe, 12 inches long
- 1-inch wooden dowel
- Drywall saw
- Putty knife
- Water pump
- Pipe clamp (if needed)
- 3-inch plastic toilet flange
- 21-inch decorative flower pot
- Drill
- Silicone sealant
- Decorative rocks
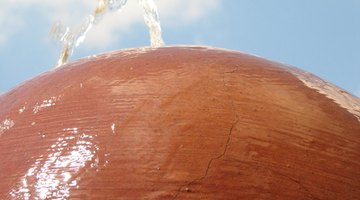
You can customize your cement ball water fountain by choosing the color of the cement and surrounding stones. When you are done, you will have a cement ball with water gushing out the top that sits in a basin filled with rocks.
Make the Form
-
Close off the drainage holes in the 17-inch plastic flower pot by covering them with duct tape. Add water to the joint compound and mix until it is easy to pour.
-
Fill the bottom 3 inches of the flower pot with joint compound. Put the ball in the pot with the air plug facing up.
-
Place a 3-inch cardboard ring -- the inside of the duct tape roll will work -- on top of the ball so the air plug is in the center of the ring. Hold it there while you pour in enough joint compound to cover the ball by at least 1 inch.
-
Let your mold set overnight.
-
Deflate the ball by puncturing it with a penknife. Pull out the ball casing. Apply cooking oil to a rag and thoroughly coat the sphere you just removed the deflated ball from.
Pour the Concrete
-
Dump the contents of the concrete mix into a wheelbarrow. Add water according to the package instructions.
-
Add the concrete colorant. Mix the concrete with the hoe, adding water as necessary, until it is wet enough to stand up on its own when you push it, but it isn't crumbly.
-
Fill the ball mold with the concrete. Shake the mold gently to remove excess air.
-
Cover both ends of the PVC pipe with duct tape. Place the pipe in the center of the concrete sphere; use a level to ensure the pipe is in the center and not listing to one side.
-
Set the plastic pot and its contents aside. Let the whole thing dry for one week.
Put it Together
-
Use the knife to cut and remove the plastic pot.
-
Create deep cuts in the top of the ball mold, using the drywall saw. Make three or four cuts radiating from the tape ring outward. Pry off segments of the mold with the putty knife.
-
Remove the tape from the ends of the PVC pipe. Feed the tube of the water pump through the PVC pipe. Fix the tubing to the bottom of the pipe with a clamp if it doesn't fit tightly in the pipe.
-
Cover the holes in the toilet flange with duct tape. Set the concrete ball in the flange with the PVC pipe going through the flange.
-
Seal any holes in the bottom of the 21-inch decorative flower pot. Drill a 1/2-inch hole in the side of the pot near the bottom.
-
Position the concrete ball so the PVC pipe is facing downward in the pot, with an inch to spare at the bottom. Feed the water pump tubing through the hole in the pot. Hold the sphere as you fill the pot with the decorative stones.
-
Use silicone sealant to seal the hole where tubing exits the pot. Connect the water pump and let the sealant dry for 24 hours.
-
Fill the pot with water and turn on the pump.
Tip
Use an inexpensive toy ball made of thin plastic and fully inflated. Find water pumps made for fountains at most hardware stores or garden centers.
Warning
Use caution when using your knife and drywall saw and cut away from your body. Concrete mix can irritate the skin and sinuses when inhaled. Wear gloves and a face mask when working with concrete mix. Keep your fountain filled with water. The water will naturally splash out and evaporate. The pump will burn out if you allow the pot to become dry.
References
Resources
Tips
- Use an inexpensive toy ball made of thin plastic and fully inflated.
- Find water pumps made for fountains at most hardware stores or garden centers.
Warnings
- Use caution when using your knife and drywall saw and cut away from your body.
- Concrete mix can irritate the skin and sinuses when inhaled. Wear gloves and a face mask when working with concrete mix.
- Keep your fountain filled with water. The water will naturally splash out and evaporate. The pump will burn out if you allow the pot to become dry.
Writer Bio
Heather Finch has been a freelance writer since the turn of the 21st century. Her official career began during her freshman year of college writing editorials about anything from manners to politics. Writings by Finch have appeared in the Western Herald, the Sturgis Journal and eHow.com. She has a bachelor's degree in creative writing and environmental studies.
Photo Credits
- water fountain image by Abrie Viljoen from Fotolia.com
- water fountain image by Abrie Viljoen from Fotolia.com
More Articles