Photoshop's Color Overlay has a wide range of applications in both graphic design and photo editing. Just as its name suggests, Color Overlay literally lays a color over an existing image. At its most basic level -- and what beginners often start with -- is simply a splash of color much like the Paint Bucket Tool that obliterates the original image. It's when you selectively choose specific areas of an image and apply a Blend Mode to the Color Overlay that you begin to see the magic it creates. To see how color overlays work, try using a single vibrant color on a black-and-white image. Once you have experimented with different effects, you'll have a better understanding of how it can be used in other projects.
Step 1
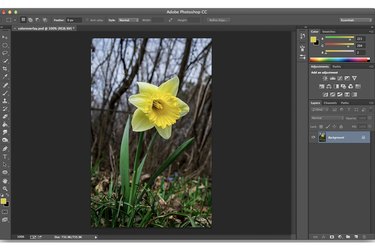
Select an image to open in Photoshop that can benefit from a single color overlay. A flower almost always works well. However, you can achieve some startling effects with other images, too, like a portrait closeup that brings out only the color of the model's eyes, or a landscape that highlights green trees or a blue sky.
Video of the Day
Step 2
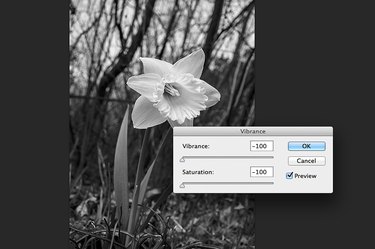
Select "Adjustments" from the Image menu and click "Vibrance." In the Vibrance window that opens, drag both the "Vibrance" and "Saturation" sliders to the left so both are at "-100." This removes all of the color from the image, leaving you with a black-and-white photo.
Step 3
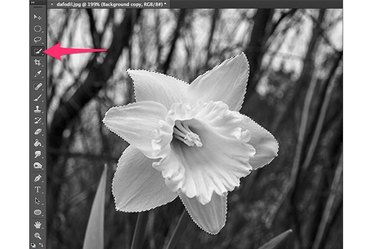
Click the "Quick Selection Tool" in the Toolbox. If you don't see it, click the bottom-right corner of the "Magic Wand Tool" to reveal it in the drop-down menu. Click the cursor on the portions of the image you want to use for the color overlay, like the petals of a flower. While this tool works well for most images, you may prefer to use the Magic Wand Tool, or to trace around the area with the Pen Tool or the Lasso Tool.
Step 4
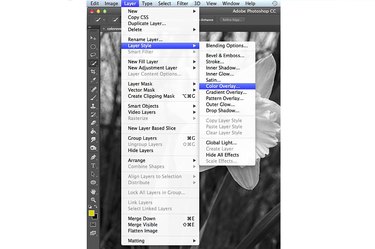
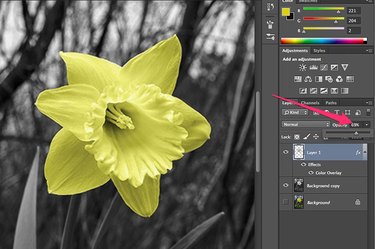
Press "Ctrl-C" to copy the selected area, then "Ctrl-V" to paste it onto the canvas as a new layer. You'll see a new layer appear in the Layers panel, which is already highlighted, indicating this is the active layer. Select "Layer Style" from the Layers menu and click "Color Overlay."
Step 5
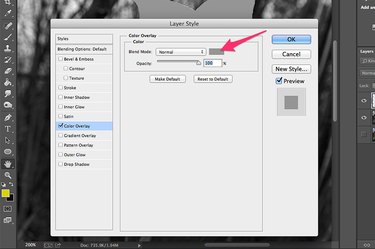
Click the small gray box near the top of the Layer Style window to set the color of the overlay. Photoshop's Color Picker opens.
Step 6
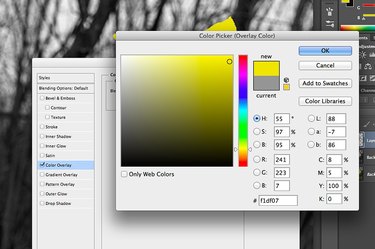
Select any color you wish for the overlay, like yellow for a daffodil, or blue for a sky. Click "OK."
Step 7
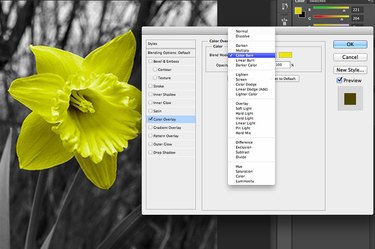
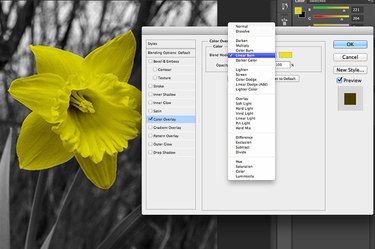
Drag the "Layer Style" window to the side and make sure the "Preview" box is checked so you can see the different blend modes on your image. Click the "Blend Mode" menu and select "Color Burn." This darkens the color you selected according to the darkness of each pixel. As a result, areas in shadows are slightly darker than areas in bright light, reflecting the natural tones of the image.
Step 8
Select "Linear Burn" from the Blend Mode menu. This gives you colors that are a bit darker than the Color Burn. Rather than just making your selected color darker for darker pixels, it decreases the pixels' brightness.
Step 9
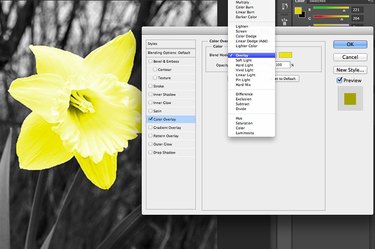
Select "Overlay" from the Blend Mode menu. This mode mixes your selected color with the grays and whites in the image, often producing a much brighter effect than the Color Burn or Linear Burn.
Step 10
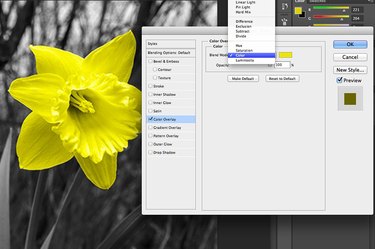
Select "Color Mode." This is often the most effective mode for adding color to black-and-white photos because it specifically works with the gray levels in an image when applying the blend color you chose.
Step 11

Select some other Blend Mode options until you find the one that works best for your image. If you want to reduce the color saturation, drag the "Opacity" slider to the left in the Layer Style window. After that window is closed, you can also change the opacity by clicking the "Opacity" menu in the Layers panel.
Video of the Day