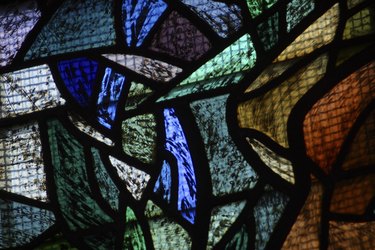
Gallery Glass is a trademarked line of products that is used to create window and glass decorations that are like pieces of stained glass. The products come in single containers and kits which are easily found at craft, discount and big box stores along with online sites. A person who has an appreciation for the art of stained glass can decorate her home with a craft that has the look--without the work generally needed to create a piece.
Leading outline
Video of the Day
A crafter should choose a simple line drawing such as a coloring page for a pattern when starting out with a Gallery Glass project. An easy project can be done on a flat ornament, sun catcher, glass mirror frame or blank art panel. Clean the surface thoroughly before starting any Gallery Glass project. Tape the pattern to the other side of the see-through project piece or window. Pull a strip of Redi-Lead from the protective backing piece. Press the strips to the glass forming the outline from the pattern. Cut pieces to the length you need with a craft knife or razor blade. Handle the Redi-Lead as little as possible to prevent damage and keep the adhering quality viable. Squirt a small amount of Liquid Lead at each joint section to fill any gaps. Wipe excess away with a paper towel. The Liquid Lead should be allowed to dry for eight hours before the painting stage of the project can be begun.
Video of the Day
Window paint
Squeeze paint from the Window Color bottle directly on to your project. The paint should first be applied along the edge of the leaded outline without going over or covering the lead. Continue adding paint to fill in the entire section with color. Use the metal combing tool to go over and over the section of paint and completely remove all bubbles. Place the wet project in an area where the air can circulate around it to aid in a thorough drying process for at least eight hours. You will notice that the paint is nearly see-through when it is properly dry.
Gallery Glass project methods
A crafter will find that Gallery Glass provides supplies and information for craft projects with methods to choose from that he finds most comfortable. A large stained glass window piece can be done on a piece of Leading Blank Surface. This "Modular" method consists of leading and painting the design on to the Blank Surface in stages, allowing the components to dry before peeling the decorative unit away to place on a window. The "Vertical" method is done by placing the Redi-Lead or dried liquid leading outline on to a flat vertical surface and applying the color directly to the project surface. A project can be created with a blank piece, panel, frameable art and flat sun catchers. Liquid lead is applied to the surface, dries and then window color is used to fill in the picture or item. The Leading Blank Surface can also be used with leading and paint to make window clings using the same step- by-step artistic horizontal method.