Things You'll Need
Socket wrench and sockets
Screwdrivers
Replacement clutch lever
The majority of Kawasaki's motorcycle lineup uses a cable-operated clutch for easier maintenance. Operating on a simple, yet important, basis, the clutch lever pulls the cable towards it, engaging the clutch. Unfortunately, the clutch levers are susceptible to being bent or broken in a low-speed accident, leaving the rider unable to shift into and out of gear. Replacing a damaged clutch lever on your Kawasaki motorcycle can be done quickly, removing any evidence of your unfortunate mishap.
Step 1
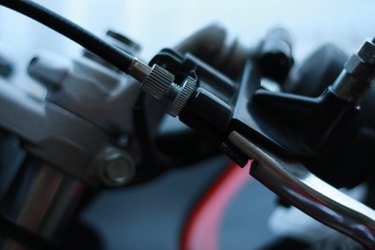
Twist the cable adjuster on the clutch lever perch clockwise to place the lever at its loosest point. Unscrew the acorn nut from the bottom of the clutch perch using a socket wrench.
Step 2
Unscrew the pivot bolt that secures the clutch lever to the perch with a screwdriver. Pull the clutch lever away from the perch. Pull the clutch cable out of the channel cut into the lever and remove the cable end barrel from the lever's catch. Discard the old clutch lever.
Step 3
Slip the cable end barrel into the catch and route the cable through the lever's channel. Slide the clutch lever into the clutch lever perch. Insert the pivot bolt and tighten with a screwdriver. Screw the acorn nut onto the bottom of the clutch lever perch, tightening it with a socket wrench.
Step 4
Twist the cable adjuster counterclockwise to tighten the cable. Adjust the cable so that the clutch lever has an 1/8 of an inch of free play.