With counter space so often at a premium in today's kitchen spaces, it can be frustrating to have to make room for appliances — even essential coffee makers. Instead of stowing your maker in the cabinet each day or sacrificing countertop square footage to have it out in the open, create a special place in your kitchen to corral all of the accoutrements in style. Putting together an at-home coffee bar on a moveable cart or bookshelf near an outlet makes it easy for you to brew and grab a cup of Joe (or tea), and all it takes is a simple DIY system for displaying mugs, plus a couple of designated shelves for housing the necessary accessories that go with it. Here's how to get the look on your own.
Display Mugs with Hanging Rods
Video of the Day
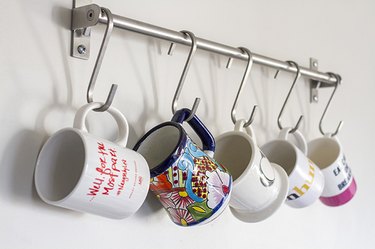
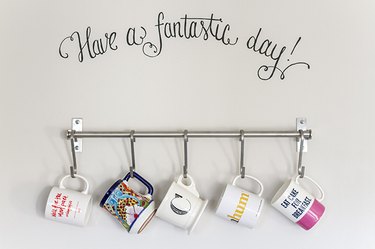
First, establish a system for displaying mugs by using an inexpensive bar and hook system, which will allow for coffee mugs to stay out in the open all week long for brew-and-go cups of coffee.
Video of the Day
Hold the bar hardware up to the wall at eye level, and check that everything is level. Mark right on the wall by putting your pencil tip through the holes in the hardware, and draw circles to match the opening. Next, use a power drill to drill holes in the wall. Drill into at least one stud if you are in an area that experiences seismic events. Use toggle bolts if you're drilling just into drywall. Finish by screwing the hardware that came with the bar system through the supports and into the wall. Attach the rod to the supports using the accompanying bolts, loop the metal hooks onto the rod and then hang mugs onto the hooks.
Set Up Open Shelves for Easy Organization
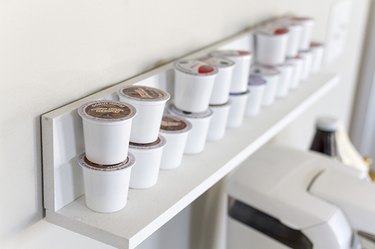
Attach two 24-inch-long pieces of pre-cut, pre-painted hobby wood one-by-fours together using screws and two L-brackets. Before putting the L-brackets in place on the wall, mark and drill your holes on the back and underside of the pieces of wood. Then, measure 12 inches down from the mug rod display on the wall and mark two level holes, about 12 inches away from one another. Drill the two holes, first in the drywall and then in the top half of the L-shaped shelf. Then attach the shelf to the wall with heavy-duty drywall screws. Finish by adding coffee pods to the shelf to keep them within easy reach.
Add a Touch of Inspiration
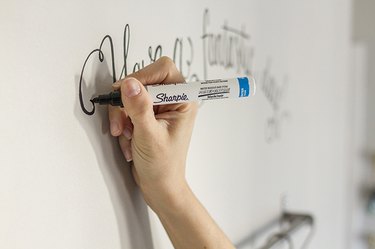
Add a whimsical, motivational saying on the wall, right above the mug rod display, by hand-writing the letters with a permanent marker or by ordering and adhering vinyl decal letters. If you use a marker, allow the letters to dry for at least 30 minutes before touching them.
Keep the Space Cohesive with Color
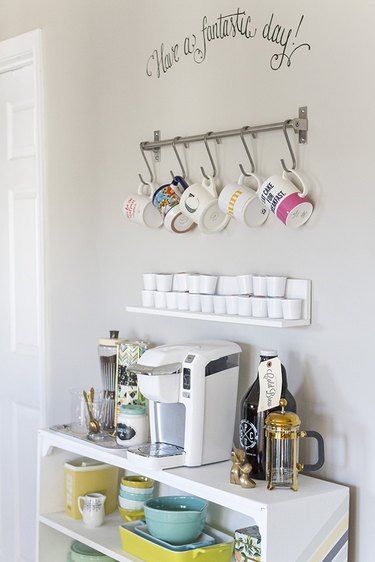
Style the coffee bar bookshelf below with all of the necessary accessories — things like a coffee maker, extra coffee grounds or beans, specialty mugs, tea bags, sugar dishes and coffee stirrers or spoons. By keeping the accessories in a unified color palette, you'll create a cohesive and intentional look that doesn't compete with the rest of the space.