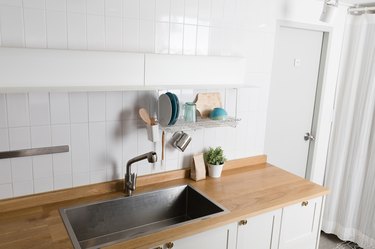
Sinks come in three different styles, and most, but not all, of them require sink clips to hold them to the countertop. The clips are most crucial for undermount sinks because they're the only things preventing the sink from falling. Because of this, undermount sink brackets are beefier than the clips for top mount sinks, which are supported by a rim resting on the countertop. Apron, or farmhouse, sinks are usually supported from below, so many of them don't even need sink clips.
Check the Sink Installation Instructions
Video of the Day
When you purchase a new sink, it comes with sink clips and instructions for using them. It's important to read the instructions because different manufacturers use different types of clips and design the sinks for those particular clips. When it comes to undermount sink brackets, they may have to be glued or screwed to the countertop, depending on the sink and countertop material.
Video of the Day
The instructions will also tell you how many clips you need to use and how far apart to space them. For example, you need fewer clips for a stainless steel sink than you do for a composite one because stainless steel is so light.
Read more: How to Install a Kitchen Sink
Installing Sink Clips for a Top-Mount Sink
A top-mount sink drops into a hole in the countertop and rests on its rim. The purpose of the clips is to keep the rim tightly sealed against the countertop surface. Here's a typical installation procedure:
- Turn the sink over and note the groove on the underside of the rim. The clips fit into this groove. Insert and space them according to the manufacturer's instructions and turn them toward the sink.
- Apply silicone caulk to the underside of the rim, drop in the sink and turn the clips 180 degrees to be underneath the countertop.
- Insert the screw into the clips, if they're not there already, and tighten each screw with a screwdriver to hold the sink securely. Don't overtighten.
Installing Undermount Sink Brackets
Undermount sink supports come in two pieces. The post has to be installed before you install the sink, and the brackets come after. Some undermount clips require you to drill holes in the underside of the countertop and tap in screw anchors for the posts, and some posts must be secured with adhesive.
Install the posts around the underside of the rim, spacing them from the edge and each other according to the manufacturer's specifications. If you glue the posts, clean the underside of the countertop with alcohol first to ensure good adhesion. Once the posts are secure, you can attach the sink to the countertop with the kitchen sink clips that came with the sink.
Read more: Undermount vs. Drop-In Sink: Which Is Right for Me?
You have to support the sink while you attach the brackets, and if the sink is heavy, this can be difficult. A good way to do it is to place a 2-by-4 across the sink opening, insert a bar clamp through the sink drain hole and tighten the clamp to hold the sink securely against the countertop. If you're installing a double sink, use two clamps.
Installing Clips for a Farmhouse Sink
Because a farmhouse sink usually rests on supports built into the cabinet, it may or may not have sink clips. If it does, they may be more like the ones you'd use for a top-mount than the ones for an undermount. Their primary purpose is to keep the sink sealed against the countertop, not to support it.
In most cases, you won't find clips. One of the main reasons is that, once the sink is in place, you have limited access to the sink rim. It's more common for manufacturers to recommend sealing the rim with caulk than to supply clips.
Read more: What Is a Farmhouse (Drop-Apron) Sink?