
Goodshoot/Goodshoot/Getty Images
You spent a pretty penny on acrylic nails to add some oomph to your hands, but after a few weeks, it’s time to say farewell to your falsies. Maybe your natural nail is growing out and the acrylics look uneven, or perhaps you’re just sick and tired of having long nails. Do not try yanking, pulling, tugging or biting off the acrylics – this is a recipe for disaster that can damage your natural nails. Instead, soak them in nail polish remover to soften the acrylic so it comes off easily.
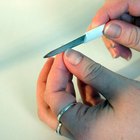
Remove any nail polish from the acrylics using cotton balls and nail polish remover. Cut the false nails with fingernail clippers so the length falls just above the skin on your fingertips.
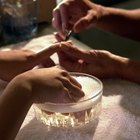
Fill a glass bowl with about one inch of acetone nail polish remover. Rub petroleum jelly over the skin around your fingernails to help protect them from irritation from the nail polish remover.
Place your fingertips into the nail polish remover, working on one hand at a time. Lay a small towel over your soaking hand and the bowl and soak for 10 minutes.
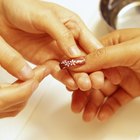
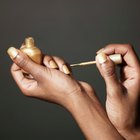
Remove your hand from the bowl. Use a cuticle pusher to gently scrape the acrylic from the natural nail, starting at the base of the nail bed and working your way to the tip.
Soak your nails again for 10 minutes. Scrape away more of the acrylic with the cuticle pusher. Repeat this process of soaking for 10 minutes then scraping, until the acrylic is completely gone. Do the same with the other hand.
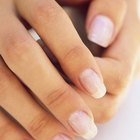
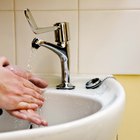
Wash your hands thoroughly with warm, soapy water. Dry them with a towel, then buff each nail lightly with a nail buffer to smooth out any rough spots.
Related Articles
What Can I Soak My Dry Cracked Hands in ...
How to Remove Acrylics With Acetone and ...
How to Get Acrylic Nails Off at Home ...

How to Soak Off Acrylic in Pure Acetone
How to Whiten Natural Nails

Can Sweet Almond Oil Be Used to Soften ...
How to Get the Smell of Fingernail ...
How to Transition from Artificial to ...
How to Remove Nail Tips
How to Remove Fake Nails Without Pain ...
How to Keep Your Pink & White Nails ...
How to Remove Acrylic Nails Without ...
How to Use a Nailene Acrylic Sculpture ...
How to Take Off Acrylic Nails With ...
How to Put an Acrylic Nail Back on ...
How to Remove Fingernail Glue
How to Fix the Skin Around the Nails

How to Take Off No-Chip Nails
How to Get Natural-Looking Acrylic Nails
How to Regrow Nails
References
Warnings
- Work in a well-ventilated area when using acetone nail polish remover. Keep the nail polish remover away from your eyes and mouth.
Writer Bio
Kimbry Parker has been writing since 1998 and has published content on various websites. Parker has experience writing on a variety of topics such as health, parenting, home improvement and decorating. She is a graduate of Purdue University with a Bachelor of Arts in organizational communication.
Photo Credits
Goodshoot/Goodshoot/Getty Images