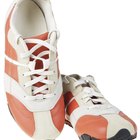
For more than 20 years, Vans Shoes have been a popular choice for America's teens. Made of a heavy duty high-quality canvas material and heavy rubber sole, the slip on style is easy-on, easy-off and perfect for skateboarding and other athletic activities. As with any shoe designed for athletic use, they can get dirty, but cleaning Vans slip-ons is easy.
Fill a bucket with hot, soapy water and get a towel or sponge.
Dip the sponge into the soapy water and using a circular motion, gently scrub the Vans slip-ons with the sponge.
Repeat until you are satisfied the shoes are clean.
Leave shoes in the sun to air dry.
Related Articles
How to Make Old Shoes Look New
How to Clean Your Merrell Shoes
How to Clean TEVA Sandals
How to Treat Doc Martens With Mink Oil
How Can I Clean the Rubber on My Vans ...
How to Deodorize Crocs

How to Clean Diesel Shoes
How to Wash Moccasins

How to Get Scuffs Off Vinyl Shoes

How to Deodorize Suede Sandal Footbeds

How to Wash Mesh Athletic Shoes
How to Clean Dr. Martens Shoes
How to Clean the Insides of Rubber Boots
How to Clean Retro 11 Jordans
How to Quickly Break-in New Sneakers
How to Wear Sperrys
How to Wear Steel Toe Shoes
The Best Way to Clean White Sneakers
How to Clean Ecco Shoes
How to Shrink Stretched Leather Shoes
Writer Bio
James Clark began his career in 1985. He has written about electronics, appliance repair and outdoor topics for a variety of publications and websites. He has more than four years of experience in appliance and electrical repairs. Clark holds a bachelor's degree in political science.