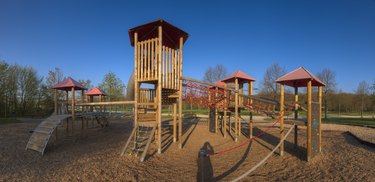
Landscape timbers are used to separate different areas of a lawn for special uses, such as raised beds for gardening. If you're looking to build a playground area with landscape timbers, know that they make the perfect border for the area surrounding a swing set or playground set. The timber can be laid using some basic tools, and it makes a durable frame to separate the play area from the rest of the lawn. The result will be a DIY playground that you can fill with mulch or rounded pea gravel for a safe and attractive play area.
Obtain the Materials
Video of the Day
For this project, you will need pressure-treated landscape timbers at least 6 inches in diameter. Buy 10-inch landscaping spikes and enough lumber to build a boundary in at least two layers, or "courses." You will need a hammer, a level and a drill to make holes for the landscaping spikes. If you plan to use rebar to anchor the timber to the ground, you should also have a sledgehammer to drive in the rebar.
Video of the Day
Prepare the Playground Area
Before getting started, measure the area of your playground set. To leave your kids enough space to run around, plan for your border to mark out about two to three times the area of the playset. Prepare the ground by digging a trench about half the height of your first layer of timber to ensure that the timber is firmly anchored in the ground. Before laying the timber, use a level to make sure the ground is even. You can place a layer of sand or compacted gravel in the trench before laying the timber to help prevent slippage.
As with any project, take appropriate safety precautions when building the border for your playground area. Wear work gloves and safety glasses throughout the process.
Lay the Timbers
Place the first course of timbers into the prepared trench, checking regularly to ensure that they are level and the ends of each timber are pressed tightly together. When the first course is laid out and level, place the second course on top of it. Be sure that the joints of the timber for the second course are spaced at least 4 inches from the joints on the first course. This will provide more stability between the layers.
If you wish to anchor the first course to the ground with rebar, drill a hole through both courses using a drill bit slightly larger than the rebar you plan to use. You should buy rebar that's a third- to a half-piece longer than the lumber itself to allow plenty of rebar to be driven into the ground below. Place the rebar in the drilled holes and hammer it in with the sledgehammer.
Use 10-inch spikes to connect the two courses. In order to avoid splitting the timber, drill pilot holes in the second course using a drill bit slightly smaller than the size of the landscaping spikes. Place one spike at either end of each timber and every 4 feet along the timber. Installing corner braces can enhance the overall stability of the structure.