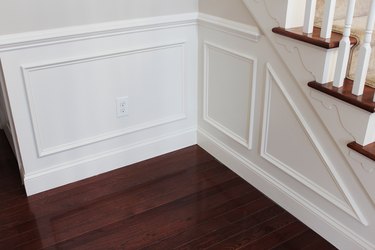
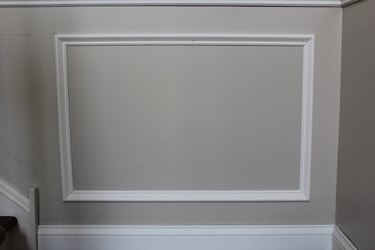
If you're looking to add some character to a boring wall or hallway in your home, turn base cap molding into shadow box trim. Shadow box trim are squares made from wood molding that get glued and nailed to the lower half of your home's wall. It's easy to install and mimics the look of a much more expensive raised panel wainscoting.
Video of the Day
Things You'll Need
Tape measure
Two-by-four (optional)
Level or straightedge
Base cap molding
Safety glasses
Miter saw
Pneumatic brad nailer
1 1/4-inch long 18 ga. brad nails
Painter's caulk
Hammer
Nail set
Wood filler
120-grit sandpaper
Paint
Scrap lumber (at least two square sides)
Tip
- Shadow box trim will look its best in your space when it's installed between baseboard molding and some sort of chair rail or divider trim. If you don't already have a chair rail molding installed, you can install them both at the same time, but it's recommended you at least have the chair rail on the wall first.
- If you’re not painting the wall and trim together, it’s easier to pre-paint the trim before cutting and installing it. Touch it up after installation.
Step 1: Determine Your Layout
You can put as many trim boxes on a wall as you'd like, but a general rule is to keep each box around 2 to 4 feet in length. However, they don't all need to be the same size. If you have a longer wall, an odd number of boxes will look more attractive than an even number, but ultimately, it's up to you.
Video of the Day
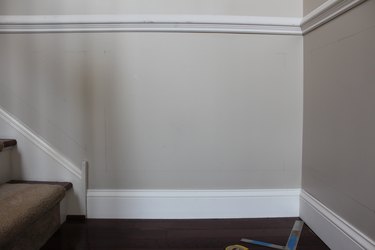
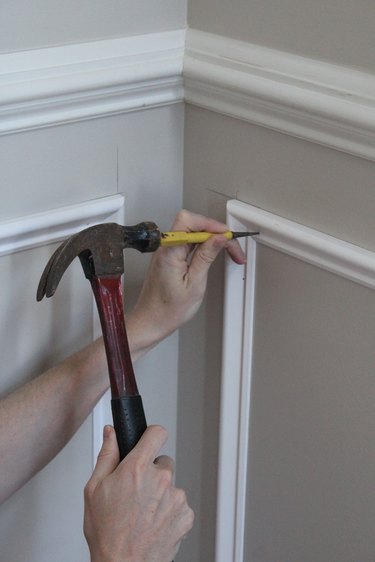
Step 2: Mark the Corners
Using a tape measure and a pencil, mark the wall at 3 1/2 inches from the top of the baseboard molding, near the corners of the wall. Make a similar mark 3 1/2 inches down from the bottom of the chair rail molding. Make the same mark 3 1/2 inches from the end of the wall or 3 1/2 inches from where you'd like to locate the next box. Draw straight lines on the marks with a level or straightedge. The intersection of the straight lines drawn from these pencil marks will indicate the corners of the shadow box trim.
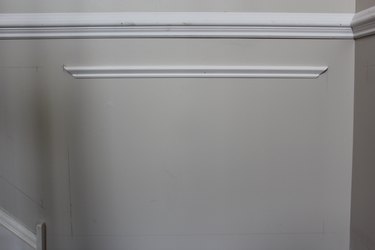
Step 3: Install the First Trim Piece
Using a tape measure, measure the distance between the top pencil marks. Set the miter saw to 45 degrees and cut one end of the base cap molding. From your first cut, measure and mark the base cap molding to the length you found on the wall.
Using the miter saw set at the opposite 45 degrees, cut the base cap molding on the mark you just made. Apply caulk to the back of the trim, align the molding with the marks on the wall and nail it in place with a brad nailer.
Tip
- You don't have to use a pneumatic nail gun, but it will be much easier than using a hammer.
- Drill pilot holes through your molding if you are hand-nailing.
- Alternately to this process, measure and precut all your pieces, and then install them on the wall.
Step 4: Install the Side Pieces
You're going to repeat Step 3 but this time for each of the side pieces. When you take your measurements on the wall, measure down from the top of the top base cap molding down to the corner mark. Cut out the side trim pieces, apply glue to the backs, align them with the top piece and the bottom mark, and nail in place.
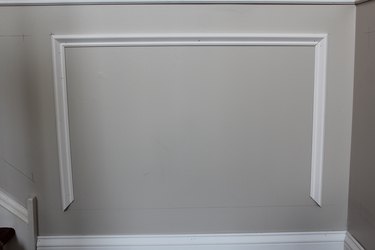
Step 5: Install the Bottom Piece
For the bottom and final piece of trim, measure the distance between the two side pieces. Cut out your molding to match that length, apply glue, align it on the wall and nail it in place. Let the glue dry completely before moving to the next step.
Step 6: Prepare to Paint
Using a nail set, sink any nails that are not recessed. Fill in the holes with wood putty, and use painter's caulk to fill in any seams between the trim and the wall.
Step 7: Sand and Paint
Using 120-grit sandpaper, sand any rough patches of wood putty. Apply two coats of paint to the molding and/or the wall. You can keep the wall a different color than the trim, or you can paint it all the same color. We used a white semi-gloss paint to give the trim a more polished look.
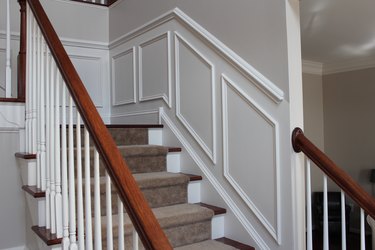
Making Angled Boxes
For angled trim boxes, like the ones on a stairway wall, you'll need to set your miter saw to a different angle than 45 degrees. The angles stated below are specific to the stairway featured in this project, which if you're lucky, will match the angle of your stairway.
Step 1: Cut Angle One
Angle 1 was 127 degrees. To cut this joint, simply set your miter saw to 26 1/2 degrees. The math to come to this conclusion: The angle on the wall is 127 degrees; you divide that by 2 to come up with 63 1/2. To make this cut on a miter saw, you subtract the angle of the finished piece from 90 degrees, thus: 90 - 63 1/2 = 26 1/2.
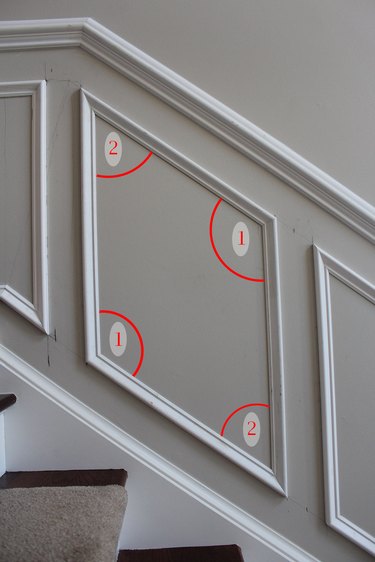
Step 2: Use a Jig for Angle Two
Angle 2 is more difficult to cut. It's measured at 53 degrees, but in reality, you need to set your miter saw to 63 1/2 degrees to cut it (long story). Most miter saws can't cut 63 1/2 degrees, so we're going to use a jig to help us get there.
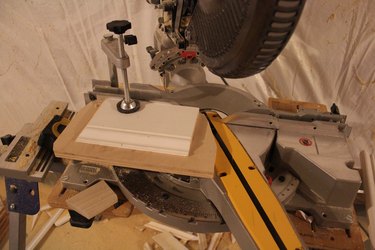
Use a square piece of scrap lumber and place it against the back of the miter saw.

Step 3: Clamp the Scraps
Now place another piece of scrap over the first board, but leave some of the right side of the bottom board exposed. Use your saw's clamp to hold both scrap pieces firmly in place. Make sure this added top board has two square sides, one pressed against the saw and the other facing the blade.
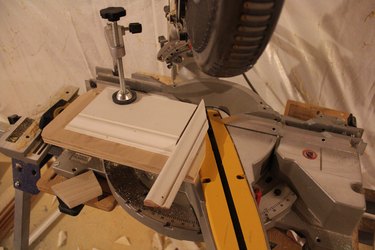
Step 4: Ready Your Trim Piece
Now you can lay down a piece of trim on top of the bottom board and butt it up against the top board and you're set. If you set your saw to 26 1/2 degrees, it's the same as a 63 1/2-degree cut the normal way.
Warning
Consult your tool's instructions before using it and always wear the recommended personal protection equipment.