Things You'll Need
Pencils or knitting needles
Empty thread spools
Sturdy dowels or old yard sticks
Cotton string
Foam blocks or pieces of wood
Levers and pulleys are uncomplicated machines that make work easier by improving mechanical advantage, meaning that they reduce the effort needed to do a task. They provide "leverage," changing the direction of our effort. If you go down to your basement or out to the garage, you'll find dozens of simple machines and combinations of simple machines. Here's how to make two of them.
Step 1
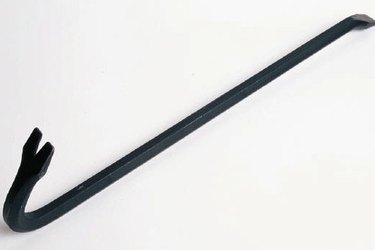
Find levers around your house and garden. Levers lift a load by perching on a pivot point, called a fulcrum, that places the effort at the end of the long arm and the object to be moved at the end of the short arm. Use a shovel to make a lever. Dig into the dirt, then pull back, pivoting the blade against the top of the soil to lift out the dirt. Scissors are made of two levers, connected at their pivot points. Claw-tooth hammers pull nails using leverage. The mechanical advantage of a lever is found by dividing the length of the distance between the source of effort (you) and the fulcrum by the distance from the object of your effort to the fulcrum. The crowbar shown would have a large mechanical advantage and could be used to pry things apart that required much more energy than the person operating it might have.
Video of the Day
Step 2
Build your own lever with a length of sturdy wood or metal and a fulcrum. You can use a piece of foam or block of wood for your fulcrum as long as you can fashion a pivot point on the top of the block for the lever to "teeter-totter" on. Put a foam "platform" on one end to put things to lift on or suspend a load with string from the end of your lever. Try lifting things with your fulcrum positioned at different points of the lever arm and notice how much easier it is to lift things when the distance between the fulcrum and your effort is longer than the distance between the object and fulcrum.
Step 3
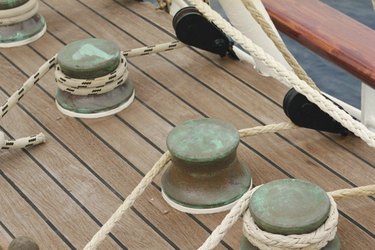
Find pulleys around home. There are pulleys in engines that hold fan belts which drive fans and pumps. Window blinds use pulleys to lift blinds using little effort. You or your neighbors may have a pole with a pulley at the top to help raise a flag. A pulley has a mechanical advantage of two, meaning that lifting an object requires half the effort it would take to lift it without a pulley. Machines using more than one pulley, called "block and tackle" have higher mechanical advantage numbers and are used to lift heavy loads (like pianos). If you ride a 10-speed bike, you have a set of pulleys that regulate the amount of effort you need to travel a set distance; your gears make it possible for you to spend less effort on flat areas and use effort more efficiently on steep hills. The gear ratio relates to mechanical advantage.
Step 4
Make a pulley by setting up two wood or foam blocks. Drill or punch a hole in each block toward the top, the same distance from the ground. Run a pencil or knitting needle through an empty thread spool and push the ends of the axle of the pulley into the blocks. Run a piece of string over the spool and tie a weight at one end. Lift the weight without using your pulley and with it. The pulley changes the direction of force and makes it possible to raise objects to the height of the pulley without leaving the ground.
Tip
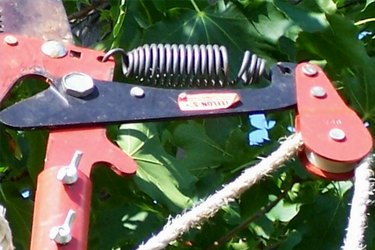
Use your knowledge. Instead of lifting heavy objects, find a way to use levers by using branches or two-by-fours, shovels, crowbars and other tools using leverage to take advantage of a heavy object. Use pulleys to change the direction of your effort and operate things by remote control, like the tree trimmer at the top of the page or your flag pole.
Warning
Always use proper safety equipment for jobs that may involve heavy weight or falling objects. Safety glasses, gloves and sturdy shoes should be part of your wardrobe when working around machines--even simple ones.
Video of the Day