
How to Replace Laminate Countertop

An update to any kitchen or bathroom can be quickly achieved by changing the laminate countertops. The varieties of design and color are endless. This is a home improvement project that is affordable and can be done by nearly anyone who is good at taking accurate measurements.
-
Shut off the water to the sink. There should be a valve on the water line that when twisted in a clockwise motion, turns off the water supply to the sink. Disconnect the drain and the hot and cold water connections. Pull the sink and set it to the side. Shut off the electricity to this portion of the home. Remove any covers for electrical plug-ins and switches.
-
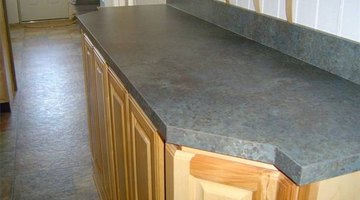
Inspect the laminate countertop for any tears or chip damage. If the laminate is intact and the counter is level, then sand the countertop and prepare to lay the new laminate directly on top of the old.
-
Measure, cut and screw a ¼- inch thick plywood board over the old laminate surface if it is scarred. Cut the hole for the sink before securing the plywood to the old counter surface.
-
Measure and mark the hole for the sink carefully on the new laminate. Subtract one inch from the length and one inch from the width of the sink to ensure a nice fit. A jigsaw with a fine blade makes this job a little easier. Firmly support the laminate during the sawing process, or it will crack.
-
Put the piece of laminate that will comprise the top of the backsplash loosely into place. Run a strip of masking tape on the top edge of the laminate that rests against the back wall. Place the pointed metal end of a scribers tool against the back wall. Rest the pencil down on top of the masking taped portion of the new laminate piece. Run the scribers tool slowly across the back wall. The pencil will translate any uneven areas along the wall onto the masking tape. Use a belt sander to smoothly remove these areas. This allows for a tight, custom fit. Remove the masking tape, apply adhesive to the back of the laminate and place the piece on top of the backsplash. Use the belt sander to even the edge.
-
Custom fit each section by taking accurate dimension measurements. Turn the laminate pieces over and apply a layer of masking tape along the measured line that needs to be cut. Use the jigsaw with the fine tooth blade to cut from the underside. The tape will help prevent cracking and splintering. Begin warming up a laundry iron.
-
Apply a coat of adhesive to the back side of the laminate. Turn it over and slowly place it down onto the counter surface. Work air bubbles out from the center towards the edges. Place the heated iron on an old cotton rag and run it over any areas that threaten to harden with air bubbles trapped. The heat will loosen the adhesive and allow you to remove the air for proper installation. Give extra attention to the point at which both edges join when cornering two new laminate pieces. Use the belt sander to finish out the edges and make them smooth.
-
Apply the adhesive to the edge and end cap pieces. Use the cotton cloth and iron to work out any air bubbles from behind the laminate. Use the belt sander, once again, to shape and smooth the laminate edge to the countertop.
-
Replace the sink and re-attach the drain and cold/hot water connections. Turn on the water to the sink by turning the valve in a counterclockwise motion. Replace the covers to all of the electrical plug-ins and switches and turn the electricity back on.

Things You Will Need
- Safety glasses
- Measuring tape
- Cotton cloth
- Clothes iron
- Adjustable wrench
- Screwdrivers
- Jigsaw and fine tooth blades
- Belt sander
- Level
- Wood screws
- 1/4 inch plywood (if needed)
- Laminate material
- Laminate adhesive
Tip
Check that the countertop is level. If it is not level, or is badly warped due to moisture, the entire plywood countertop base will need to be replaced. Take your time measuring. The greatest factor in successfully completing this project lies in accurate measuring.
Warning
Always shut off electricity before removing covers to electrical plug-ins and switches due to the electrocution hazard.
Wear safety glasses when sawing the laminate.
Check out this related video.
References
Photo Credits
- All images are courtesy of Photobucket photo pool.
- All images are courtesy of Photobucket photo pool.
More Articles