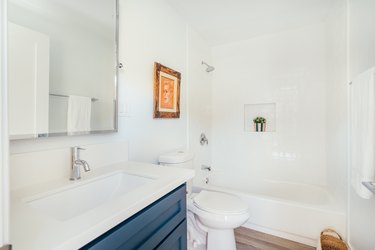
Laminated shower wall panels differ from molded shower enclosures. Each wall is a separate piece. Laminated sheets can't be bent to fit corners or edges, so individual pieces are cut to fit each wall.
Laminate is tough, easy to work with and water-resistant, but you can't install it directly on drywall. You'll have to install a moisture-resistant backing, such as cement board, before you place the laminate. With laminate sheets, you can then customize your shower with a variety of textures, patterns, colors and designs that are widely available on the home improvement market.
Video of the Day
Video of the Day
How to Install Laminate Sheets for Shower Walls
Step 1: Shut Off the Water
Turn off the water to the shower. If the valve to the shower is not accessible, the main water shut-off valve is outside of the house, in line with the water meter at the curb.
Step 2: Remove Shelves, Fixtures and Trim
Remove knobs or any superficial shelves or fixtures. Pry off and remove any trim or moldings using a pry bar.
Step 3: Measure Fixture-Bearing Wall
Measure the wall that bears the fixtures. Subtract 1/8 inch from the width and height. Install a 60-tooth carbide-tipped wood-cutting blade on a table saw to ensure clean cuts.
Step 4: Cut the Cement Board
Put on safety glasses, hearing protection and a mask or respirator and cut the cement board to the dimension you arrived at, using the table saw. Subtracting 1/8 inch from the wall's width and height prevents the cement board from binding during installation.
Step 5: Cut Fixture Holes
Take the measurements for fixtures. Use an appropriate-size hole saw and drill/driver to cut holes in the cement board for the fixtures.
Step 6: Install the Cement Board
Apply panel adhesive to the cement board. Press it in place, fitting it over the fixtures. Measure an adjacent wall, subtract 1/8 inch, cut, glue and place panels on this wall the same way you did the fixture wall. Then repeat on the remaining walls.
Step 7: Cut Laminate Sheets
Install an 80-tooth, TCG laminate-cutting blade on the table saw. Cut the first laminate sheet for the wall with the faucets with the table saw. Cut all sheets 1/8 inch less than the measurement for the width to prevent them from binding during installation.
Step 8: Cut Fixture Holes in Laminate
Measure and cut the holes in the laminate for the fixtures using a hole saw. Place the laminate on a flat surface. Slip a piece of scrap wood under it to serve as backing to drill the holes. Turn the laminate upside down.
Step 9: Dry-Fit the Laminate
Dry-fit the laminate on the wall to ensure it's the right size. Trim if needed and dry-fit again. Repeat as necessary.
Step 10: Install Laminate Over Fixtures
Brush a coat of contact cement on the back of the laminate and the wall using a brush. When the contact cement is dry to the touch, press the laminate in place, starting at the bottom and gently bending it as needed to fit over the fixtures as you work upward to the top. Bump the surface of the laminate randomly with a rubber mallet to bond it to the cement board.
Step 11: Install Laminate on Adjoining Walls
Cut the laminate for the adjoining walls one piece at a time. Repeat dry-fitting, gluing and placing each successive piece.
Step 12: Apply Silicone Sealant to Seams
Apply a bead of color-matched silicone to one seam or joint at a time. Smooth the bead into the corner with a wet fingertip. Add silicone everywhere the laminate terminates against a wall or the ceiling, all the way around the perimeter.