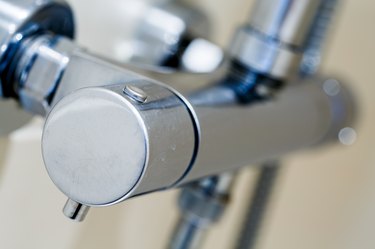
The mixing valve (or faucet cartridge) of your Moen shower is what maintains the water pressure and temperature in a Moen single handle shower faucet. Over time, this valve can become worn out and stop working as well as it once did. Troubleshooting your issues with the valve is key to figuring out whether you can repair it or will need to undertake a shower mixing valve replacement.
What Is a Moen Shower Valve?
Video of the Day
A Moen pressure balance shower valve is designed to sense hot and cold water pressure. It's supposed to keep the hot and cold water in balance, preventing uncomfortable surges between hot and cold.
Video of the Day
Does Your Moen Shower Faucet Need Repair?
There are two main indicators that your Moen shower valve is in need of some attention. You'll notice either a strange inconsistency in your shower's temperature or surges of water pressure. If you're experiencing either of these issues, checking (and either fixing or replacing) your mixing valve is a good place to start.
How to Check a Moen Shower Faucet
Before you undertake any sort of shower repair, it's important to make sure the water is switched off. Double check that it is before you start.
You'll need to open up your Moen shower handle. An older model will have a plastic cap that you open. Newer models can be opened by loosening the hex nut on the faucet's underside. You can usually do this with an Allen key.
Once you've loosened the cap or hex nut, you can open up the shower handle. Using a screwdriver, remove the screws holding the handle to the wall. You can then gently lift the handle away from the wall.
The valve will be held in place with a retainer clip. Take this clip off in order to gain access to the valve. This can be done with needle-nose pliers.
Using the pliers, grab on to the mixing valve. Move it gently from side to side to loosen it. You can then pull the valve cartridge out.
Check the valve for any visible signs of wear or cracks. Use a brush to remove dirt and get a better look at the valve. You may notice a small amount of corrosion on the valve's O-rings. This can be treated by lubricating the rings with petroleum jelly. If there's more serious damage, discard the valve and replace it.
Mixing Valve Cartridge Replacement
If you can see that your shower's mixing valve is broken (or want to try a new one as a means of troubleshooting your water pressure issues), you can insert a new one in the place of the old valve.
First, clean the valve's housing thoroughly. A wire brush is a good way to remove corrosion and other debris. Then, insert the new mixing valve, replacing the retaining clip to hold it in place.
Place your faucet handle back on the wall and replace the screws. Then, replace the cap or hex nut to secure it.
You can now turn your water back on and test the water pressure and temperature. If the mixing valve was the problem, your shower should now be fixed. If the problems you were experiencing persist, it's likely the issue was not with the mixing valve and you may wish to call a plumber.