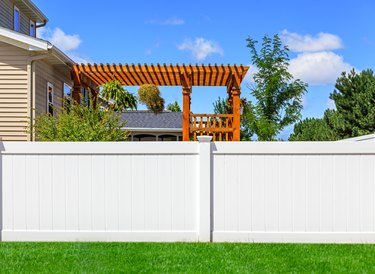
Your neighbors might be perfectly nice people or unapologetic busybodies — either way, you'd be more comfortable with a little more privacy. Adding height to an existing fence is often logistically possible, but many homeowners get tangled in red tape when they make their fences higher. Don't waste time, effort, and money to make a privacy fence taller only to find out that your improvements run afoul of your HOA's or town's bylaws. Research local zoning and permit requirements before doing any building so you can enjoy your added privacy for years to come.
Increasing the Height of Privacy Fencing
Video of the Day
There are a few methods you can use to make an existing privacy fence taller. Attaching lattice is one of the cheapest and easiest ways to add height to your fence. Your local home improvement store should sell sections of latticework that come in various colors, sizes, and patterns. Use metal tie plates to connect the lattice to the existing fence. Some homeowners coax flowering vines to grow along the lattice to create even more privacy in the yard. Your home improvement store may also sell decorative screen panels that can be attached to the top of a fence.
Video of the Day
The other option is to make something customized for your fence. A carpenter may be able to build and install extender panels that match the style of your existing fence. Or, if you have a fence made of simple vertical wooden slats, a carpenter may also be able to cut new pieces from the same type of wood and screw them into your existing slats to add height to the fence.
Installing a New Privacy Fence
Certain kinds of fences are tough to alter without the addition being glaringly obvious. If your fence has an arched top, attaching a straight piece of lattice isn't going to be aesthetically pleasing and may not be feasible at all. Any sort of arched fence can be difficult to change. It may ultimately be easier and even more affordable to install a new privacy fence, especially if you're replacing a perfectly good fence and can sell it to someone else. Using reclaimed barn wood or making a fence entirely out of lattice are relatively cheap privacy fencing options.
Creating Privacy Without Changing the Fence
Maybe your HOA won't approve your fence extension or you really want more privacy but would rather not change the look of your existing fence. Bringing in new trees and tall plants like bamboo may give you the privacy you want and make your yard feel more like a garden oasis. Talk to an expert at a local nursery for guidance about trees and tall plants that flourish in your climate and are safe to plant near a fence line.
Another option that may be easier and more attractive than changing an existing fence is to create a free-standing privacy screen just a foot or two inside the fence. Install fence posts and hang gauzy fabric or lattice screens at a height that obscures the top of your fence. Have a landscaper design a structure that's stable enough to withstand the elements and gives you the privacy you crave without incurring the wrath of your HOA.
How to Build a Free-Standing Privacy Screen
There are a lot of ways that you or a contractor may install a privacy screen inside your backyard, but a basic version is fairly simple to erect on level ground. Remember to check your municipality's permitting requirements before starting, and make sure you know where underground utility lines are located before digging. Take weather into account; building a privacy fence in a high-wind area requires taking extra precautions.
Step 1: Plan the Layout
Measure out the area where you want to build your privacy fence to determine how long you want it to be and how many posts you'll need. Posts may be anywhere from 4 feet apart (in high-wind areas) to as much as 6 feet apart. Figure out where each post will be placed and drive a stake into each spot or mark it with spray paint.
Step 2: Cut Fence Posts
Cut pressure-treated ground contact lumber to create posts of your desired height, keeping in mind that 3 feet of each post will be underground. So if you want a finished fence that's 6 feet tall, fence posts should be 9 feet long.
Step 3: Dig Post Holes and Prepare Braces
Using a post hole digger, create holes that are 3 1/2 feet deep and three times the width of the posts in diameter. Shovel in enough gravel to cover the bottom 6 inches or so of each hole.
Step 4: Set Posts in Concrete
Stand a post up in each hole. Use a level to position the post so it's perfectly vertical; then set up wooden braces that will hold the post steady as the concrete sets. To do this, use angled 2 x 4 braces and screw two braces to each post. Drive a wooden stake into the dirt next to the base of each brace and screw the brace to the stake, creating extra stability to prevent the post from shifting. Fill the hole with concrete up to about 3 inches below ground level. Let the concrete dry completely according to manufacturer directions.
Step 5: Attach Pickets or Privacy Screen
There are a lot of ways you can complete your freestanding privacy fence, but the easiest way may be attaching horizontal fencing pickets to the vertical posts you've installed. Nail or drill the pickets into the posts, placing the lowest one at least 2 inches off the ground. Cut spacers from scrap wood to set between pickets as you place and attach each one, guaranteeing that you'll create a level, equally spaced fence.