Angled miter cuts are used for trim moldings, furniture work and other woodworking projects where you want corners to have a more finished look than would be achieved by crude butt joints. When room corners or furniture shapes consist of perfect right angles (90 degrees), calculating and cutting miters is easy—the two pieces will be cut precisely at 45 degrees, which, when joined together form the perfect 90-degree right angle. Power miter saws have a preset stop at 45 degrees (as well as other common angles) to make this work easier.
It's not always quite this simple, however. Many homes have walls that are slightly out of square, which means that the inside angles might be 88 degrees, or 95 degrees, for example. How do you figure out the correct angles for the miter cuts in these situations? And what do you do if you are building a polygon-shaped piece, such as a five- or six-sided cedar planter? In this situation too, the miters will have to be cut at different angles than the standard 45 degrees. You'll learn about that in a minute, but first, let's talk about mitering pieces to fit around wall corners.
Video of the Day
Video of the Day
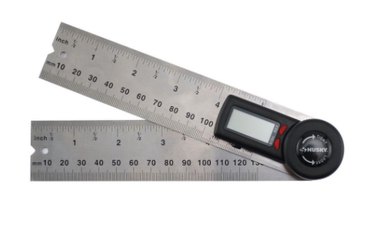
By far the easiest way to calculate miter angles on existing wall corners is using an electronic protractor—an inexpensive, battery-powered tool that is a great addition to any home toolbox. The tool has adjustable arms that can be set to conform to wall angles, and a digital display that reveals the angles at which the adjoining surfaces meet.
Once you find the corner angle, calculating the angle at which molding miters need to be cut is an easy matter of dividing by 2.
How to Calculate Miters Using a Digital Protractor
Step 1: "Zero" the Protractor
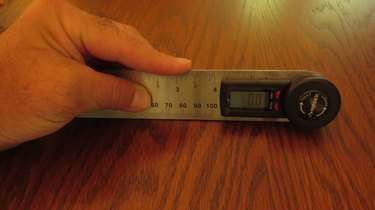
To work properly, the digital protractor first must have its scale "zeroed." Put the arms of the protractor together and press them tightly against a flat work surface. Hold the "ON" button down for several seconds until the digital display reads 0.0 degrees. You are now ready to measure wall angles.
Step 2: Measuring Miters for Inside Corners
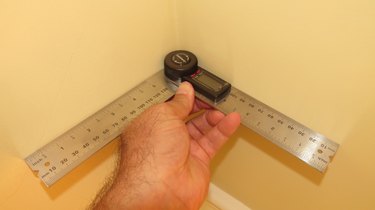
To measure an inside corner, turn the tool ON, and then place the blades of the digital protractor tightly against the adjoining walls on the inside corner and tighten the thumbscrew on the tool. The digital display will now tell you the angle for the inside corner.
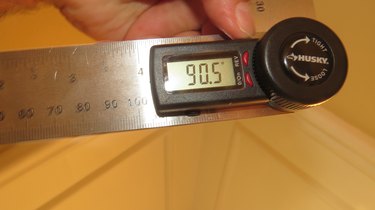
To calculate the proper miter angle for trim-work moldings, simply divide this angle reading by 2. In the example shown, the inside corner is 90.5 degrees—nearly square. The precise miter angle of your moldings should be 45.25 degrees. (In practice, this is pretty nearly a perfect corner.)
Step 3: Measuring Miters for Outside Corners
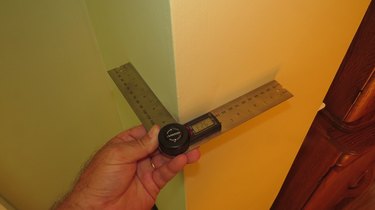
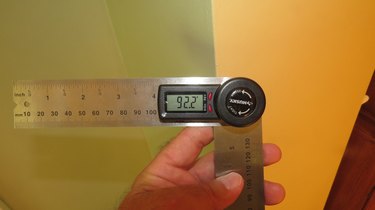
To measure miters for outside corners, place the blades of the digital protractor over the adjoining faces of the walls so that the center pivot point fits around the outside corner. Tighten the pivot nut, then remove the tool from the corner to read the angle in the digital display. In the example, the outside corner is 92.2 degrees. Divide this number by 2 to calculate the angle of the miter cuts for your moldings. In this case, the moldings should be mitered at 46.1 degrees. Especially in older homes, it is very common for wall corners to be out of square by a few degrees.
Step 4: Calculating Miters for Multi-Sided Projects
If your project requires mitered corners but does not have four sides, your miter angles will need to be set at unusual angles. For example, a five-sided planter will not have 90-degree corners made with two pieces mitered at 45 degrees, but instead will have five corners that are each 72 degrees, requiring miters that are 36 degrees for the joining pieces.
How are such miters calculated?
The first principle to remember is that any enclosed project, such as a planter, will have angles that total 360 degrees —the measure of an entire circle. So on a five-sided figure with five corners, each corner will be one-fifth of the 360 degrees‚ or 72 degrees. Because each of these corners will be made with two adjoining pieces, each of those pieces will be mitered at half of 72 degrees, or 36 degrees.
It's all fairly simple in practice, but to make it even easier, here's a convenient chart to give you the proper miter angles for such projects:
Three-sided figure: Three angles of 120 degrees
each, made with pieces mitered at 60 degrees.
Four-sided figure: Four angles of 90 degrees
each, made with pieces mitered at 45 degrees.
Five-sided figure: Five angles of 72 degrees
each, made with pieces mitered at 36 degrees.
Six-sided figure: Six angles of 60 degrees each, made with pieces mitered at 30 degrees.
Eight-sided figure: Eight angles of 45 degrees each, made with pieces mitered at 22.5 degrees.
Twelve-sided figure: Twelve angles of 30 degrees each, made with pieces mitered at 15 degrees.
The pattern now is probably clear: All angles in the project, added together, must total 360 degrees, and each corner will be made with two pieces mitered at half the corner angle.