
How to Add an Exterior Outlet to Vinyl Siding

Table of Contents
If your existing exterior outlets are in the wrong places or simply aren't enough, you can easily add more power to your outdoor space by adding an exterior outlet to vinyl siding.
Need a little more power for all your outdoor activities? Even if you have vinyl siding on your home, you can use an interior power source to quickly and easily install a new outdoor electrical outlet.
Tip
Make sure to call your local inspections office before you get started.
Choose the Location
Before you break out the power tools, you need to decide where to place your new outdoor outlet. If you want to make things easy on yourself, you can find an existing interior outlet and use it as your guide. You can later tap into the electricity there. Most building codes will not allow you to use outlets in the bathroom, laundry room or kitchen. Furthermore, you should not choose an outlet that you use for any other major appliance.
These restrictions leave you with outlets in the bedrooms, living areas, dining room or den. Consider what you will use the additional outlet for and which placement would be most convenient for that. Your new outlet should go between the same two studs as the interior counterpart. You can use a stud finder to mark the stud cavity.
Check the Electrical Box
Warning
Turn your circuit breaker for your work area off and use a non-contact voltage tester to be sure there's no power going to that outlet. Don't take any chances.
Don't get started until you're sure that the electricity to your interior outlet is off. Then, you can unscrew the wires from the outlet and check the electrical box. Ensure that the box is plastic. If not, you should replace the old metal box. Then, check that it is large enough to contain another set of wires safely. Remember that overstuffing an electrical box can be a serious safety hazard.
Drill Through the Wall
Break out your power drill, a 1/4-inch bit that is 18-inches-long and some safety goggles. Make sure you use a bit you can spare, since drilling through some materials may destroy it. Start near the edge of the interior outlet and drill through to the exterior. If you want the exterior outlet to be a little lower, drill at an angle.
Wire the Interior Outlet
Check to see what size wire is already present in the electrical box. Then, run the same-sized wire through the hole you just drilled to the outside of the wall. If it helps, you can use an old wire coat hanger to run this wire. Next, connect the hot, neutral and ground wires to the interior outlet. You can put the faceplate back on this outlet and move the rest of the project outside.
Cut the Siding
To properly install your outdoor outlet, you must first cut away a small section of the vinyl siding. There are three ways to complete this task. You can use whichever of the three tools you have available and feel most comfortable operating.
Warning
No matter which method you choose for cutting vinyl siding, make sure to wear safety goggles.
The first option is a circular saw. Use a fine-toothed, plywood-cutting blade in your saw for this project. Make sure to use light pressure and take care not to cut past the siding. If you're not comfortable with a circular saw or you haven't added one to your tool collection, don't worry. You can use medium pressure and a utility knife to complete this step. If you start with either of these and need just one more small piece chipped away, you can break out some tin snips to finish the job.
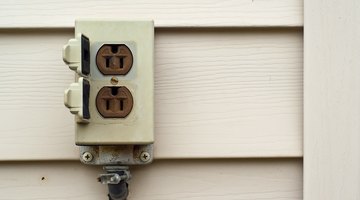
Install the Exterior Outlet and Box
To be safe, and meet code requirements, you should always use GFCI outlets and a box to cover the outlet. GFCI outlets continuously monitor for any imbalance in the flow of electricity and trip the circuit if it senses something is off. This feature is especially important for outdoor outlets, which often handle large amounts of electricity at a time; for instance, electric lawnmowers. Once you have found the outlet and cover box that meet your requirements, use the manufacturer's directions to mount the box and wire the outlet.
Now, you're ready to power all your outdoor toys and tools. You can turn the breaker on and test your brand new outlet.
References
Writer Bio
Mackenzie Maxwell has been writing in the home category since 2016. She developed an affinity for home renovations at an early age, when her parents constantly renovated the family home. She has written for companies like ServPro and helped local construction companies.
More Articles