
Science projects only work when you properly collect and record your data. Those looking at your experiment will want to know what factors were involved and what the results of your tests were. Keepin good notes are regarding your observations and measurements are invaluable and are required as proof to support your conclusionlts.
- Notebook
- Pen
- Computer (optional)
When doing a science project for school, keep in touch with your science teacher and let him know what your project is about. He will make sure you are doing a project that is safe and within the rules of the school's project guidelines.
When collecting data by quantitative measuring, be accurate and true, as it is easy to want to "fudge" results so that a project would come out the way you want it to. Remember, a science project poses a hypothesis, and an experiment is then conducted to test the hypothesis. If the experiment proves the hypothesis to not be true, this does not mean that the project is a failure. The goal of the experiment is to prove whether or not the hypothesis is correct.
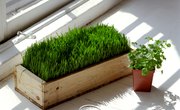
Write down the goal of your experiment, a hypothesis and the factors affecting that goal. For example, consider an experiment to determine which types of soil are best for growing a specific type of plant. The goal is to find what type of soil works best, so only the types of soil should be different among the plants.
Create a chart to collect experimental data. Label items with a number so you won't get them confused, and refer to them by their numbers when making notes and recording data. Your list or chart should name each item individually and describe its condition at the start of the experiment. Use numbers when possible, such as "Plant #1 is 5 inches tall and in full bloom with 3 flowers at start of experiment."
Record all data that is specific to the particular experiment, such as time, amount of growth (as in the case of plants and seeds), distances (as when comparing how far a plastic bottle filled with water will roll down an inclined plane compared to a similar bottle filled with air), color (as comparing a newspaper kept in a drawer for a week to one kept in a sunny window), weight, temperature and other measurable quantities.
Use a computer spreadsheet program to record observational and measurable data from the experiment. A similar chart comprising rows and columns could, of course, also be drawn on paper. As an example of using a spreadsheet format, label a separate column for each item in the experiment, such as "Plant #1, Plant #2, Plant #3" and so forth. Label each row with important information about each plant such as "Date," "Time Fed," "Time Watered," and "Observations". The labels will change based on your specific project. Fill in the information as you perform these tasks.
Create a bar or pie chart to give a clear visual indication of the collected data and help draw conclusions from the observations and measurements. Spreadsheet programs usually have a feature that will automatically draw graphs and charts from the data entered into rows and columns.
Record additional personal notes and observations on paper or in a log book. A log book is valuable for collecting data when many entries need to be recorded, as when making observations daily over a period of weeks or months or taking dozens of measurements.
Print your data if it's stored on a computer when the experiment is over. If hand-written, make sure your handwriting is neat and readable. Use charts, lists, diagrams and recorded observation notes in the presentation of your science project.
Collecting data from a science project must be accurate and factual. Also, write down all the factors in an experiment that are being kept the same. Typically, only one item, known as the variable, should change during the experiment. In a plant experiment, record what time of day you water your plants and how much you will give each. You should give the same quantity of water to each plant, and they should all grow in the same environment, such as sitting in a sunny window. The variable might be the type of soil used.