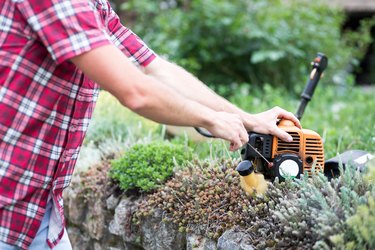
If the starter cord of your Stihl string trimmer breaks, you can be happy it's a Stihl because the manufacturer makes it easy to disassemble the starter so you can replace the cord. In fact, replacing a Stihl cord is easier than most others because you only need to remove three screws to get at the relevant part of the machinery. They are T27 torx screws, though, so you won't be able to do the job with the Phillips screwdriver you use for most other tasks. If you were prudent enough to save the tool that Stihl supplied with the trimmer, you're all set, but if not, you may need to take a trip to the hardware store to get a T27 torx screwdriver.
Do the Job Safely
Video of the Day
A string trimmer can cause a lot of damage if it starts unexpectedly, and while there is little chance of this happening, it's still a good idea to pull the spark plug wire off the plug as extra insurance. To prevent damage to the tool and to make it easier to work, lay the trimmer flat on a work table rather than trying to do the job on the ground. Finally, put on latex gloves because there's a small but not insignificant chance of spilling gas.
Video of the Day
Things You'll Need
How to Disassemble the Pull-Start Mechanism
Step 1: Remove Three Screws
Put on your latex gloves and set the trimmer with the rear of the engine housing facing you. Find three or four screws arranged in a triangle or rectangle around the starter grip. Unscrew and remove these and set them aside.
Step 2: Remove the Housing Cover
Lift off the housing cover, which contains the starting mechanism, and turn it over to reveal the rope rotor. Be careful because when you remove the cover, because the gas tank may sag since it's held by one of the screws you removed. Keep one hand on it when you remove the cover.
Step 3: Remove the Pin Holding the Rope Rotor
Pull off the pin holding the rope rotor to the housing using needle-nose pliers. The pin may be difficult to remove, but there's no need to twist or lift — just pull the pin straight out using as much force as necessary.
Step 4: Remove the Rope Rotor
Grasp the rotor on both sides and lift it off the spindle. As you lift, keep a finger on the spring mechanism that will be left behind to prevent it from popping off. If the spring comes out of the casing, it will unwind violently and putting it back is a job you don't want to have to do.
Replacing the Pull Rope
Once you have the rotor out, you can pull out what's left of the old rope. Before installing a new rope, it's a good idea to melt the end with a lighter to prevent fraying. Feed the end of the rope through the housing on the trimmer before feeding it through the hole on the hub of the rotor. Tie a knot on the end and then slip the rotor back onto the spindle and rotate it until it locks in place on the spring.
To tension the rope, make a loop so it can't wind onto the rotor and then turn the rotor counterclockwise through six rotations. Release the loop and keeping a finger on the rotor so it moves slowly, allow it to rewind, winding the rope around it as it does. When it has fully rewound, the starter grip should be flush against the housing. If not, repeat the process with an extra rotation.
When you replace the cover on the housing, be sure the gas tank is lined up so that the screw passes through the hole on its bracket. Replace all the screws, tighten them down firmly and then give the rope a test pull to make sure it retracts.