Things You'll Need
Newspaper
Tape measure
Latex balloon
Liquid starch
Bowl
Scissors
Red feathers
Scissors
Masking tape
Pin
Gesso surface prep
Paint brush
Metallic bronze acrylic paint
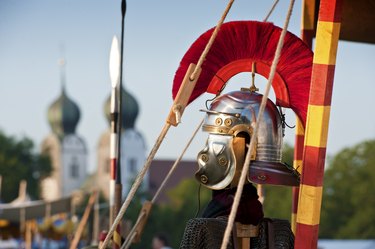
Roman soldiers are known for their iconic armor. Each man could march up to 20 miles a day wearing his iron and leather breastplate, shield and helmet, along with his gear. Make your own Roman soldier helmet, or galea, out of paper mache. Whether for play or a school project, you can create your own version with simple materials. Form the helmet and then paint it to look just like the ancient ones of the past.
Step 1
Tear newspaper into strips about 8-inches long. You will need approximately 50 to 75 pieces.
Video of the Day
Step 2
Measure the circumference of your head. Blow up a balloon to the same circumference as the measurement. Place the balloon in a bowl so it will not fall off of the table.
Step 3
Pour the liquid starch into a large bowl. Drop a strip of newspaper into the bowl. Pull the strip out and run it between your fingers to eliminate the excess liquid.
Step 4
Place the strip flat onto the balloon. Repeat the process, laying the strips in opposite directions so the surface of the balloon is covered.
Step 5
Cut the shaft off of the feathers so that there is only 1/4 inch left. Place a piece of tape on either side of the feathers and run the tape down the middle of the balloon so the feathers are sticking straight up. You may need to add more tape to secure. Add more pieces of starched paper around and in between the feathers.
Step 6
Create a total of five layers of paper strips. Let it dry overnight.
Step 7
Check to ensure the paper has dried. Pop the balloon with a pin. Pull out all pieces of latex that may have stuck to the inside of the paper mache.
Step 8
Try to place the helmet on your head. You may need to cut off a couple of inches where the balloon had started to taper. Cut around the bottom of the helmet so it will fit your head.
Step 9
Mark two long upside-down U shapes on the front of the helmet on either side of your nose. This will create eye holes and the nose guard. Cut these shapes out.
Step 10
Paint the helmet with a coat of Gesso and let dry. Paint with a second coat and let dry completely. This will give you a smooth finish.
Step 11
Paint the helmet with two coats of metallic bronze paint. Let it dry in between coats.
Tip
Gesso is a medium that primes a surface for acrylic paint. It is typically white and hardens when dry. It helps give the surface texture so the paint can adhere and not soak through the newspaper.
Video of the Day