Things You'll Need
Decorative bottles with lids, corks or caps
Dish soap
Water
Vegetable brush
Vegetables such as assorted hot peppers
Citrus fruits
Kitchen knife
Paper towels
Light-colored oil such as olive, almond or mineral oil
Skewer
Hot glue gun with glue stick
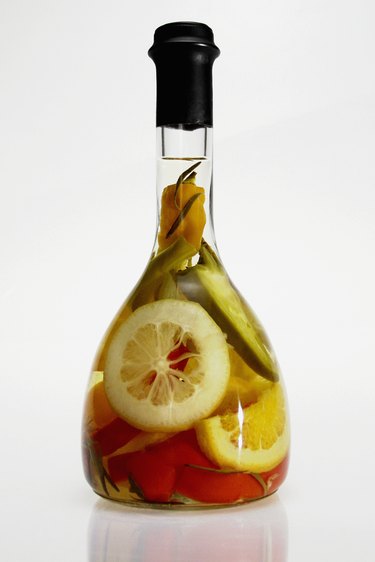
Fruits or vegetables in oil bottles serve as delectable decor perfect for display on a kitchen counter or shelf. Since these bottles are made for display only, the oil inside them may be whatever you have on hand that is relatively clear: olive oil, almond oil or even mineral oil. Glue the lid onto the bottle after creating your display for added safety and to ensure the oil doesn't spill if the bottle is tipped.
Step 1
Wash the bottles and their caps or lids in water with mild dish soap. Rinse the bottles and allow them to air dry completely, inside and out.
Video of the Day
Step 2
Wash off all the fruits and vegetables, removing any produce stickers as you find them. Scrub dirty produce with a vegetable brush to remove caked-on dirt. Pat the produce dry with paper towels.
Step 3
Cut citrus fruits into slices thin enough that light shows through them if you hold them up to a light source. Remove the seeds with the tip of the knife. Cut vegetables such as carrots into rings or slices, if desired. If the vegetables are narrow enough to fit into the mouth of one of the bottles as-is, leave them whole if you prefer that look.
Step 4
Fill each bottle approximately 1/3 full of oil, which allows space for as many produce pieces as you'd like to add without the bottle overflowing. Use any light-colored oil you have on hand, such as mineral oil or olive oil.
Step 5
Arrange fruits or vegetables in each bottle, keeping fruits and vegetables separate for consistency. For example, arrange one layer of lemon rings, a layer of lime rings and one of orange rings, alternating layers until the bottle is full. Use a skewer to help push each produce item through the mouth of the bottle and into position within the jar. Add more oil as you fill each bottle, as you feel necessary.
Step 6
Top off each bottle with enough oil to fill it completely when you've added all the produce you wish.
Step 7
Plug in the glue gun until the glue stick in its chamber is warm. Apply a strand of hot glue around the perimeter of each cork, or the inside perimeter of a cap or lid; secure the top to its respective bottle.
Tip
Save unusually shaped clear bottles as you come across them; filled oil bottles make decorative gifts as well. Wide-mouthed bottles provide space for larger fruits or veggies to be displayed.
Dried flowers or herbs also display nicely in decorative oil bottles.
Warning
Do not mix oils within one bottle or the two oil types may not blend together, creating an odd appearance.
Keep decorative oil bottles away from young children and pets.
Remind everyone in the home -- or those receiving the bottles as gifts -- that the bottles are for display only, and the contents are not safe to eat.
Video of the Day