Things You'll Need
Plywood (measurements will depend on the size of your crate)
Wood
3 square inches of framing (square)
Laths, 2 ½ by 1 ¼ inches
4 small iron wheels (about 8 inches in diameter)
Nails
Hammer
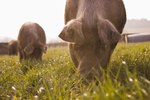
Crates can come in handy when it comes to transporting livestock such as pigs, cattle, sheep and poultry. A well-built shipping crate should allow proper airflow and should be made of plastic linings and good absorbent materials. The structure and materials used in building a crate will also depend on where you are shipping it. If you are shipping it by air, there are some IATA guidelines that you need to take into consideration. (See references)
Decide on the size of your crate. This depends on the size and number of pigs you are planning to transport. You might want to add an extra 1 or 2 inches to your measurements to allow for seam and shrinking. A crate that is 4 feet by 6 inches wide and 2 feet by 6 inches high would be large enough for your average sized pig.
Cut the plywood according to the desired sizes. The framing should be about 3 square inches and the laths 2 ½ inches by 1 ¼ inches.
Determine the length of your end pieces. Use this measurement to cut pine boards to add support and strength to the structure. Flush the edges of the pieces. Attach these boards to the end pieces by nailing through the pine into the plywood every 4 or 5 inches in the center.
Measure the distance between the pine boards. Cut four pieces of board to length. The pieces should fit snugly. Attach the plywood the same way as you did the longer pieces.
Attach the bottom of your crate. Ask someone to hold the pieces up and the board side out as you nail the bottom. Attach this to the back and the front ends.
Flip your crate. Beginning at the bottom end, nail the pieces together.
Attach your iron wheels at each side of the crate. The wheel should be mounted in the middle of every end. Your crate should have four wheels: two on each side and two for preventing the crate from digging into the earth.
References
Writer Bio
Residing in West Georgia, Michele Casteel has been writing about holistic health, creative writing technique and financial issues since 2007. Casteel published the book "Gateways:The Initiation." She has been published in "Community Connection" magazine and ghostwritten several holistic health books. Casteel attended two years at Georgia State University.