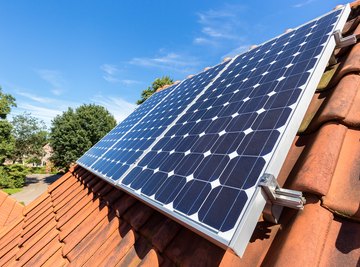
A solar cell is the fundamental element of a solar panel, a device that converts sunlight into electricity. Professionally made solar cells are made of special semiconductor material sandwiched between metal contacts and a layer of non-reflective glass. The semiconductor is specially made to be sensitive to the photoelectric effect and responds to light by releasing a flow of electrons. Though these materials are expensive, you can make your own solar cell at home out of materials that are much cheaper and easier to come by. A homemade solar cell is perfect for science class demonstrations, science fairs and even powering your own small devices.
TL;DR (Too Long; Didn't Read)
A homemade solar cell made of copper sheet and salt water can give insights into the physics of the photoelectric effect.
Heat a Copper Sheet
Light a propane torch and hold it in one hand. Pick up a sheet of copper in your other hand, using tongs. Hold the sheet of copper in the flame. Heat the copper until the section under the flame has been glowing red hot for at least a minute.
Set the copper sheet down on a fireproof surface. Pick it up with the tongs again, so you can hold a different location and heat a new area with the torch. Repeat this process until you have treated a few different spots on the copper sheet.
Place the copper sheet onto your fireproof surface and let it cool to air temperature. The areas that you heated should be blackened, though other colors may be present as well.
Prepare First Wire
Strip 1 inch of insulation off of each end of one copper wire with the wire strippers. Clamp one end of the wire to the copper sheet, using the alligator clip. Make sure that it is clamped to clean, unblackened copper.
Prepare Salt Mixture
Mix salt into a cup of water until it stops dissolving. At this point the salt solution is at maximum strength. Place several drops of salt water onto different blackened areas of the copper. Because of microscopic irregularities on the surface of the copper each drop will produce different results.
Prepare Second Wire
Strip one end of insulation off each end of the other wire, using the wire strippers. Place one end of this wire into one of the drops of salt solution on the blackened areas of copper. Place the weight on top of the wire to hold it in place. The solar cell is now ready. If you hook the other ends of the wires up to a small light bulb while the cell is in direct sunlight, it will light up. If you hook them up to a voltmeter, you will be able to see how much voltage your solar cell is producing.
Warnings
Use the propane torch in strict accordance with the manufacturer’s safety instructions.
References
Warnings
- Use the propane torch in strict accordance with the manufacturer’s safety instructions.
About the Author
Jason Thompson has been self-employed as a freelance writer since 2007. He has written advertisements, book and video game reviews, technical articles and thesis papers. He started working with Mechanical Turk and then started contracting with individuals and companies directly via the Web.