Things You'll Need
Ladder
Ruler
Pencil
Drop downspout
Chalk line
Line level
Tape measure
Vinyl hanging brackets
Screws
Screw driver
Gutter connectors
Gutter end caps
Gutters
Miter saw
Sandpaper
45-degree elbows
Downspout pipes
Downspout hangers
Downspout couplers
Installing rain gutters my seem like a daunting task but it doesn't have to be. Not if you opt to install vinyl rain gutters. A vinyl system is designed for the do-it-yourself homeowner who'd rather invest a little sweat equity into installing his own gutters than invest money in hiring someone to do it for him. All the pieces snap into place and vinyl is lightweight. Both of these features comes in handy when you're high atop a ladder working with long lengths of gutter. Installing gutters is a two person job. so if you can find someone who has a project that requires two people too, trading labor can be a win-win for you both.
Step 1
Set up a ladder at one end of the roof line and climb to the edge of the roof with ruler and pencil and a drop downspout. A drop downspout is one of the components of the vinyl gutter system. It's where the water drains through to a downspout. Lay the ruler flat against the roof. Position it so the 6-inch mark is at the bottom edge of the roof line. Hold the downspout against the fascia board--the horizontal board under the roof overhang to which the gutter attaches. Match the end of the ruler with the outside edge of the downspout. Pencil the the top screw hole of the downspout on to the fascia. Go to the opposite end of the roof and repeat. Snap a level chalk line between the two pencil marks. Make sure the line is level before snapping. Hang a small line level on the string. Adjust one end of the chalk line up or down until level.
Video of the Day
Step 2
Back at the original end of the roof line, hook a tape measure on to the end of the fascia and measure out 10 feet along it. Pencil in a mark 1/4 inch below the chalk line. Measure off another 10 feet, but this time make a mark 1/2 inch below the chalk line. Continue, at each consecutive 10 foot mark adding another 1/4 inch to the distance below the chalk line. This establishes the correct slope for the gutters so the water will flow down it. This creates a 1-inch slope in 40 feet. Line up the chalk line along these marks and snap to create a sloping chalk line.
Step 3
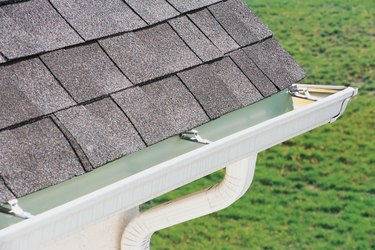
Attach the first gutter hanging bracket 4 inches in from the original end of the roof line. Screw it to the fascia board. Add a bracket every 20 to 24 inches. Attach a gutter connector to the fascia with screws every 10 feet. A gutter connector marries two sections of gutter. Attach a drop outlet at the far end of the roof line.
Step 4
Snap a gutter end cap to the first 10-foot length of gutter. Rest the gutter on top of the brackets. Starting with the first bracket, snap the gutter into it. Move to the next bracket and do the same. Snap the end of the gutter into the near side of the gutter connector. Lay a second length of gutter across the next set of gutter brackets. Snap the first end of the gutter into the other side of the gutter connector. Continue snapping the gutter into the brackets. A length of gutter will have to be cut to size for the final section. Measure the distance between the gutter connector and the drop outlet.
Step 5
Turn a gutter section over and mark the length on the back of the gutter. Cut the gutter using a fine-tooth miter saw. Sand off any vinyl burrs. Snap the cut gutter into place.
Step 6
Cut a 5-inch length of downspout pipe and insert it into the bottom of the drop outlet. To the bottom of that plug in a 45-degree angled elbow positioning the open mouth towards the wall. Put another elbow at the end of a downspout pipe with the mouth facing out. Hold the downspout pipe against the wall and measure the distance from elbow to elbow. Cut that length of downspout pipe and insert each end into the corresponding elbow. Snap a downspout hanging bracket over the face of the downspout pipe and screw it to the wall. Add a bracket every 18 inches. Use downspout couplers between sections of downspout pipe. Cut the downspout off at the top of the foundation. Add another elbow facing out and to that add another section of downspout pipe to drain the rainwater away from the house.
Tip
When you go to buy a vinyl gutter system, ask the clerk for a brochure from the gutter company to guide you in picking all the components.
Video of the Day