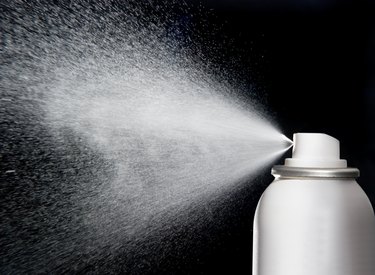
You're halfway through spray painting a metal patio chair and the inevitable happens: The spray can nozzle clogs. These simple plastic nozzles clog easily due to their design, but they're also easy to repair without any tools or harsh chemicals.

The Simplest Clearing Procedure
Clearing a clogged nozzle is easiest when done as soon as it starts to clog. Wipe excess paint or liquid off the outside of the nozzle, then hold the can upside down and spray it for five seconds inside a box or towards a piece of cardboard or paper. The air exiting the can usually clears the gummy substance causing the clog.
Video of the Day
Video of the Day
The Soak Method
Sometimes, soaking the nozzle in hot water will help release the substance clogging the tiny hole. Gently pull the nozzle off the spray can, then set it into a disposable cup filled with enough tap water to cover the nozzle. If the nozzle floats, keep it submerged by placing a metal washer or other weighty, small object atop it. Let it soak for at least five minutes, then wipe off and dry the inside and outside of the nozzle. Place it back atop the spray can, shake the can as detailed on the can instructions, then spray it at a piece of cardboard outdoors or in a well-ventilated area. If it still doesn't spray, hold the can upside down after shaking it for a minute or so, then spray it again. The pressure buildup should release the softened matter clogging the nozzle. If it still doesn't clear, remove the nozzle again and push a thin pin or needle into the spray hole. Use care not to widen the hole, as this will effect the nozzle's performance and may ruin it.
A Cleaning, Clearing Trick
Instead of fiddling with a needle or pin to clear a clogged nozzle, use a water-displacing lubricant spray to clear it. Remove the clogged nozzle from the spray can, then remove the nozzle device from the top of the water-displacing lubricant. Place the clogged nozzle atop the lubricant can, then spray the lubricant a few times. If that doesn't work, replace the original nozzle on the lubricant can, then spray the inside and outside of the clogged nozzle with the lubricant.
Preventive Maintenance
With spray paints and other compounds that may dry once out of the can, spraying the can upside down at the end of use can help keep the nozzle clear. Read the can for specific clearing procedures as these may vary based on brand or can contents. Only spray the can in a well-ventilated area. Spray against cardboard or scrap paper in case liquid comes out as well. After spraying the can upside down, wipe the nozzle off with a paper towel.
When All Else Fails
If unable to get the clog resolved, or if you clearing efforts made the nozzle virtually unusable, there's still hope. Replace the old nozzle with a new or clean one off of a similar spray can. In many cases, the nozzles are completely interchangeable.