
Tiny robots are, of course, awesome. We use them to seek out survivors when a building collapses, to crawl across surfaces inhospitable to our delicate human meats, and most recently, to clean our homes (because pushing a vacuum around is just so 90’s). However, by far one of the most awesome micro-robot constructions is the flying robot, which can be built with surprisingly few components if you know how. While the actual arrangement and aesthetics of the robot are up to you (its insane, diabolical creator), the components and technique required are largely the same regardless of design.
- Airframe (lightweight metal or plastic rods)
- Level (preferably laser-guided)
- RC or switch circuitry
- Power source
- High-speed motor(s) and mounts
- Propeller blades (lightweight plastic or similar)
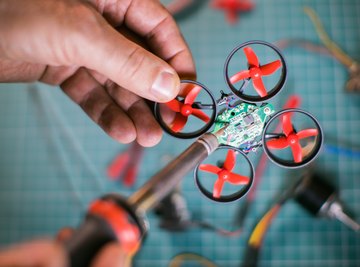
If your robot shows signs of unbalanced flight, power it down and adjust the motor mounts and propellers, as these are directly responsible for the flight pattern of the robot.
Construct an airframe that will hold your power source, control circuitry and motors evenly and efficiently. For example, if you plan on using a single propeller, your construction will most likely be a compact vertical design, whereas a multiple-propeller setup will require a wider “floating island” design. In flying machines of any kind, balance is absolutely everything. Use the level to ensure that every angle of your airframe is perfectly even, as even the slightest degree of imbalance can cause a disastrous flight failure.
Mount your control circuitry to the airframe, maintaining a balanced weight ratio. If you’re building an RC flyer, you’ll want to ensure that any range-extending antennae are securely fastened away from the spinning blades of the propellers, as well as mounted in a well-balanced fashion.
Power your circuitry by adding the power source to your constructed airframe and connecting it to the control circuitry. Again, be sure to maintain a balance on your airframe and avoid making one side heavier than another. Ensure proper connections between your power source’s leads and the control circuitry, or your robot might suffer from stuttering power connection problems.
Mount your motors to the airframe securely, and attach the propeller blades. Use the level to ensure exactly level motor mounts and propeller attachment, or the flight pattern of your robot will be off. Bad motor mounts or uneven propellers can cause spinning or “rolling” in a flying vehicle, which inevitably leads to a catastrophic flight failure.
Test your completed flying robot by placing it on a level, smooth surface, and powering it on. If you’re using an RC-based control scheme, stand well back from the testing area before powering on your flyer. If you’re using switch-based controls, keep your hands and fingers well away from the soon-to-be-spinning propellers. Switch your robot on, and then move away quickly and smoothly, to avoid interrupting the robot’s takeoff flight pattern.
Things You'll Need
Tips
References
Resources
About the Author
Jordan Gaither is a degree-holding communications major with a successful freelance career. He's been writing professionally for over a year, and has just recently made the jump to full-time freelancer. Among others, he's been published by Internet Brands, Apartment Ratings, eHow, CV Tips and the Examiner.