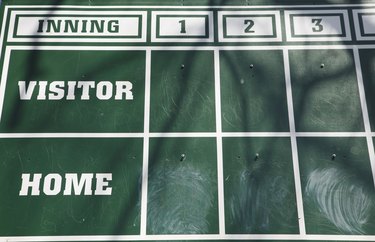
Microsoft PowerPoint presentations don't have to be all work and no play, especially when the software's components include shapes that can bring designs such as scoreboards to life. Whether you plan to incorporate a game into your next slideshow or are just using PowerPoint as a graphic design platform, creating a scoreboard using PowerPoint will help you hit a home run with your next presentation.
Step 1
Launch PowerPoint 2013 and click the "Blank Presentation" button. When PowerPoint opens, by default your scoreboard slide size will be the Widescreen 16:9 dimensions. If you require a different layout for the scoreboard, click the "Design" tab, then click the "Slide Size" button on the ribbon. Choose either the Standard 4:3 dimensions or "Custom Size" and enter your preferred width and height.
Video of the Day
Step 2
Hold down the "Shift" key and click once on the two placeholder text boxes for the title and subtitle on the slide. Press the "Delete" key to remove them, getting them out of the way of your design work.
Step 3
Click the "Insert" tab, then click the "Pictures" button. Browse to where you have an image for the scoreboard, such as a team's logo. Double-click the file to add it to the scoreboard, then drag it into place. Repeat to add additional pictures, such as if you're scoring two opposing teams. You can also click the "Online Pictures" button and browse clip art to add.
Step 4
Click the "Shapes" button on the Insert tab's ribbon. Choose the first regular rectangle shape. When you see the cursor change to a plus symbol, draw a vertical rectangle (one that is taller than it is wide). Note that by default, PowerPoint makes the color of the rectangle medium blue with a darker blue border, and the orange Drawing Tools tab and ribbon open at the top. Click the "Shape Fill" button on the ribbon and change the color of the rectangle to "No Fill." If desired, change the rectangle's border to "No Outline."
Step 5
Right-click the rectangle and choose "Copy." Right-click the scoreboard area and choose "Paste." When the copy of the rectangle pastes in, drag it slightly to the right of the original one. Repeat until you have a line of rectangles. Draw a circle with the cursor around all of the rectangles in the row. Press the "Ctrl-C" keys to copy the row, then press the "Ctrl-V" keys to paste in the new row. Move the row below the original row, giving you two rows of rectangles like you would see in a baseball scoreboard. You may also want to align the rows to the right of the logos you pasted in.
Step 6
Alter the rectangles or score boxes as desired, such as making just two large rectangles on the scoreboard sitting below two logos, as you may see in a basketball scoreboard. You may also insert a text box by clicking the Insert tab's "Text Box" button and drawing the box, then clicking inside to type terms such as "Home" and "Away Team."
Step 7
Give the scoreboard an eye-catching backboard by clicking the "Design" tab. Click the "Format Background" button on the ribbon and choose from options such as "Solid fill" for a solid color, "Gradient fill" for options such as rainbows and pinstripes, and "Picture fill," which is where you can import images and clip art of an actual scoreboard, netting, grass, sky, or anything else that may bring the scoreboard to life.
Video of the Day