With Excel 2013, you can rotate almost any text vertically or at an angle. No need to use text boxes, like in Word -- Excel can rotate text in cells, on tables or in charts. Text rotation won't affect how formulas work, but it can cause cells to take up more space on the screen, which might make your spreadsheet harder to read.
Step 1
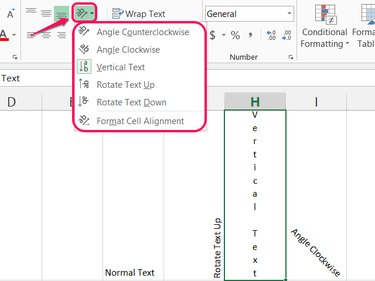
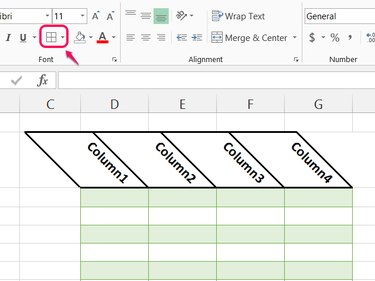
Select a cell and pick a new option from the Orientation menu in the Alignment section of the Home tab.
Video of the Day
To choose a more specific angle, pick **Format Cell Alignment."
Step 2
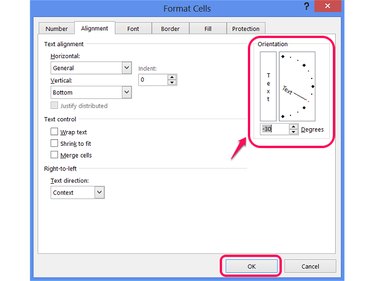
Enter a number of degrees or click and drag on the diagram in the Orientation section of the dialog box to set the text angle, and then press OK.
Step 3
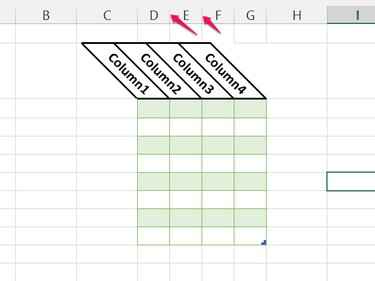
Change the orientation on the top row of a table to give it a stylish slant. Don't use too shallow an angle, however, or the text overlaps significantly between columns, making the table unclear. Stick to angles below -45 degrees, above 45 degrees or use regular horizontal text.
Step 4
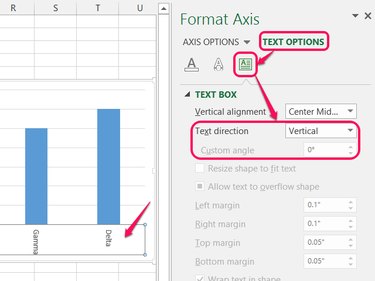
Double-click the column or row labels on a chart to set their orientation. On the sidebar, click Text Options, open the Text Box section and pick a new Text Direction or set the Custom Angle.
As a shortcut, you can select the labels and use the Orientation button, as you would when editing cells to pick a common angle, such as Vertical Text. You can't open the cell alignment options when editing labels, however, so to set a custom angle, use the sidebar.
Step 5
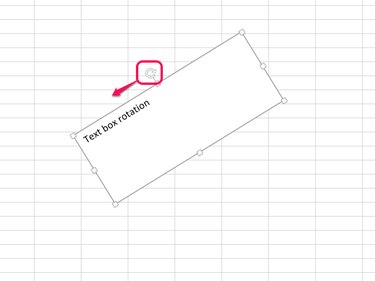
Select a text box and drag the rotation handle in either direction to angle the box and its contents.
Video of the Day
- Microsoft Office: Rotate or Reposition Data in a Cell
- Microsoft Office: Change the Display of Chart Axes
- Microsoft Support: How to Control and Understand Settings in the Format Cells Dialog Box in Excel
- Microsoft Office: Apply or Remove Cell Borders on a Worksheet
- PCWorld: 10 Secrets for Creating Awesome Excel Tables