
How to Build Outdoor Stairs on a Hill

Things You Will Need
- Marking paint
- Hard board siding
- Stakes
- Screws
- 2-by-6 treated boards (10 feet in length)
- 4-by-4 block
- 4-by-4 treated posts (10 feet in length)
- Circular saw
- Jig saw
- Ear protection
- Eye protection
- Level
- Shovel
- Pea gravel
- Screws
- Drill
- Drill bit
- Deck boards
- Framing square
- Pencil
- Sledge hammer
- Tape measure
- If building stone stairs
- Mechanical plate compactor
- Pavers
- Wall stones
- Masonry adhesive
- Flag stones
- Heavy maul
- Diamond blade for your circular saw
- Small stones (for shims)
- 50/50 compost
Tame a steep slope to make your hillside safe for walking by building outdoor stairs. Stairs provide a beautiful way to easily access any part of your property and can add instant curb appeal to your home. You can choose to create your stairway with stones, wood or a combination of the two. Stone stairs are more expensive and labor-intensive, while using wood for your walkway is a low-cost, much less strenuous way to go. Each lends beauty to your landscape in its own way; just choose materials best suited for your site and you’re ready to create your perfect pathway.
Mark and Measure
-
Spray paint an outline of your path on the ground. Drive stakes at the top of the painted line. Tie a string from the top stake to the bottom stake and attach a line level to the string. Level the string by adjusting it until the bubble on the level is in the center.
-
Calculate the run of the stairs by measuring the total distance the stairway will run up the leveled string from the bottom stake to the top stake.
-
Calculate the rise by measuring the vertical distance from the string (which is tied and leveled from the bottom to the top stake) straight down the bottom stick to the ground. Calculate the number of steps you’ll need by dividing the total rise of your slope (in inches) by 8 for a steep slope or 6 for a gentle slope. So for a 24-inch rise, you’ll need three or four steps, depending on how steep your slope is.
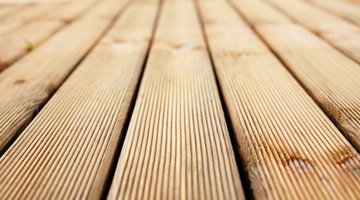
Building Wooden Stairs
-
Place hard board siding along the path, just on the outside of the paint marks. Screw stakes to the siding to hold the shape. Remove the siding.
-
Cut the10-foot 2-by-6-inch side joist for the first section. Start at the bottom and place the joist 3 inches from the paint line. Put a 4-by-4 block under the uphill end of the joist and place a level on top of the joist. Shift the joist up and down the hill until it's level. Mark the cutting line on the inside where the joist meets the 4-by-4 block and cut the joist using a circular saw. Be sure to wear eye and ear protection when cutting.
-
Dig 2-foot-deep holes for the posts. Mark the locations for the posts by replacing the joist you just cut on the ground and measuring about 3 inches from the ends and 2 inches away from the side of the joist. Move the joist aside and dig the post holes.
-
Cut the posts. Pour about 6 inches of pea gravel into the post holes, place the posts into the holes and mark the cutting level. The posts should be level with the joist, so place joist next to the post, level it and then mark your cut on the post. Cut the posts with a circular saw.
-
Screw the joist to the posts. Place the joist on the outside of the posts and use 3 ½-inch construction screws to fasten it to the posts. When cutting the downhill end of each joist, leave a 1 ¾-inch overlap using your framing square. Toe-screw (sink the screw into the wood at an angle) the downhill end of the joist into the post. This is the riser for your stair.
-
Repeat steps 1 through 5 as you work your way up the hill to finish framing one side.
-
Cut and attach a side joist for each stair before moving on to the next. You will have framed one side of each stair when you finish step 7.
-
Frame the other side of the stairway. Cut a 27-inch-long end joist for each step. Use these joists to mark the post locations as you did in Step 2. Set the posts so they’re square with the joist you’ve placed on the finished side. Measure and cut the posts; dig the post holes; and screw the side joists to the posts and end joists.
-
Add a center joist to each section you’ve framed. Use 2-by-6 joist hangers on the ends of each joist and tap them into place with your hammer.
-
Cut the decking boards and screw boards to the joists. Cut the boards into 4-foot lengths and dry-fit the boards, spacing the decking to fit along the curve of the stairway. The first board should overhang the top of the riser by 1 inch and should overhang the riser equally on both ends.
-
Use the hard board siding form you built in Step 1 to shape the curves. Bend the siding as desired and draw a line to mark the siding on the deck boards you’ve dry-fit along the stairway. Do one section and one side at a time and have someone hold the curve as you draw the line. Keep the curve 1 to 3 inches away from the joists.
-
Cut the ends of the boards and secure them to the siding with stakes. Use a circular saw and cut where you’ve marked the boards. Use a hammer to drive in stakes beside each cut end and screw the stakes to the siding. Repeat until you’ve finished one side of the stairway.
-
Transfer the shape to the other side. Use a tape measure to measure 36 inches from the finished side of the stairway to the other side and mark the measurement. Cut the boards with a circular saw or jig saw. Place hard board edging and stakes against the edge of each board and screw the edging and stakes into the boards.
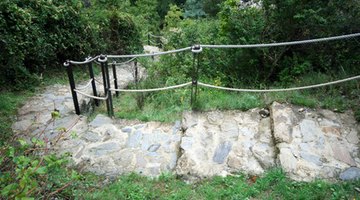
Building Stone Stairs
-
Dig a base trench that is about 6 inches deep and 18 inches wide inside the paint outline. Put about 4 inches of gravel in the trench and compact it with a mechanical plate compactor.
-
Set first set of risers. Use a mitered paver for the edges and several regular border pavers in between. Place a level on top of the pavers each time you set one and adjust the new paver as necessary until the line of pavers is level. Place gravel underneath if you need to raise the paver's height.
-
Glue the pavers together by running a 1/4-inch S-shaped bead of masonry adhesive on the sides of the pavers. Use the level on top of the line of pavers and adjust the pavers as necessary to level off the pavers. You can also use wall stones for risers if you prefer.
-
Excavate for your next set of risers. Dig straight back and at the same level as the top of the first set of risers to about 10 inches in back of the area you’ll be placing the second risers. Set the next set of risers so the distance from the ground to the top of the riser pavers (or wall stones) is equal. Add gravel if needed to level the risers.
-
Arrange flag stones on top of the dirt area you’ve prepared between the first and second set of risers. Trim the flag stones in the middle or on the edges by chipping or using a circular saw with a diamond blade. As you arrange the stones to make the stair top, leave a 2-inch overhang that suspends from the stair top over the edge the bottom set of risers. Also leave 2-inch gaps in between each of the stair top stones. You will be adding 50/50 compost and packing it into the gaps to help stabilize the stones.
-
Set the level on top of the stones and adjust as necessary by tapping them or adding gravel until the bubble is in the middle of the level as it lays across all the stones. Trim, if necessary, by chipping the overhang stones with a heavy maul (wear safety glasses).
-
Shim unstable stones or pavers with stone chips and glue the shims to the risers with masonry adhesive. Repeat steps 1 through 7 until your entire path is complete.
-
Blend your stairway into your landscape by adding stones to the edges. Fill in the gaps you’ve left between the stones on the top of the stair with a 50/50 mix of compost and soil. Pack it in tightly with your hands.
Tip
Frame one side completely before starting to frame the other side. The angle of the posts on either side of the stairway doesn’t have to be perfectly square, but they should be at roughly the same angle. As you place deck boards along the curve of your stairway, you can open up the gaps at one side if you need to get the boarding to follow the curve.
Warning
Always wear eye and ear protection when cutting wood or stone.
References
- “Wooden Walkway,” Travis Larson, May 2010
- HGTV: How to Build a Stone Staircase
Writer Bio
Based in California, Tracie Grimes began writing in the medical field in 1984. She has since expanded her areas of expertise to include DIY projects, parenting and craft articles. She is a monthly contributor to "Kern County Family Magazine" and "Bakersfield Magazine," with work also appearing in parenting magazines across the United States. Grimes received her bachelor's degree in journalism from Northern Arizona University.
Photo Credits
- Deck de madeira image by CarlosNeto from Fotolia.com
- Deck de madeira image by CarlosNeto from Fotolia.com
- stone stairs image by Xavier MARCHANT from Fotolia.com
More Articles