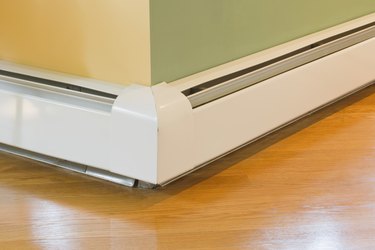
Baseboard heaters are generally used in rooms that may be far from the central heating source. These electric heaters are positioned under windows, where falling colder air will mix with the heaters' rising warmer air and circulate throughout the room. The heating elements are powered by either 120VAC or 240VAC depending on the manufacturer's specifications. In most all cases, multiple baseboard heaters can be connected together if the total operational amperage does not exceed the wires and circuit breaker's capacity. If the heater is too large it must be wired on a separate circuit.
Step 1
Understand that only like voltage heaters can be connected together. In other words, only 240VAC heaters can be connected to other 240VAC heaters. The same holds true for 120VAC units as well.
Video of the Day
Step 2
Calculate the total amperage draw from the heaters in a room. As an example, there are three baseboard heaters rated at 1,500 watts and powered by 240VAC. Multiply the 1,500 watts times 3 for a total of 4,500 watts. Find the total amperage by dividing the wattage by the voltage (a = w/v). The amperage draw for the three heaters is 18.75 amperes. These three baseboard heaters can be connected to a two-pole 30-amp breaker that is supplying power to the heaters with a two-wire 10-gauge ROMEX® cable-type wire.
Step 3
Remove all electrical power from the main panel circuit breaker box. Find the large switch labeled as "main". Turn it off. Remove the outer cover by using the screwdriver and pulling the screws that holds the cover in place.
Step 4
Install the new two-pole 30-ampere circuit breaker into the main panel box. Follow the manufacturer's instructions for the installation. Different brands of circuit breakers will have different installation instructions.
Step 5
Run the two-wire 10-gauge wire ROMEX® from the main panel box to the first of the baseboard heaters. Open one end of the baseboard heater using the screwdriver. There should be a label on one end that reads "wire connection" or "heater connection".
Step 6
Use a pocketknife to remove the outer insulation of the ROMEX® wire for approximately 6 inches. This will reveal a single black insulated wire, a single white insulated wire and a bare copper wire.
Step 7
Remove the single wire's insulation using the wire strippers. Reveal approximately 3/4-inch of the bare copper underneath.
Step 8
Run another piece of the two-wire 10-gauge ROMEX® from the first heater to the second heater into the same "wire connection" location. Perform the same ROMEX® wire installation to the third heater. You should now have a piece of ROMEX® wire running between each of the three heaters. Strip all the wires in the same fashion as described in step 6 and 7 above.
Step 9
Connect the wires by twisting them together using the wire pliers. In the first baseboard heater, twist the bare copper ends together of the black wires from the 10 gauge ROMEX® to one of the wires leading to the baseboard heating element. Perform the same task to the white wires from the ROMEX® to the other wire leading to the baseboard heating element. Cover the twisted bare wire connections with a wire nut. Connect both bare copper wires from the ROMEX® to the green screw on the metal frame of the baseboard heater.
Step 10
Connect the wires in the same fashion to the second baseboard heater. There will only be one 10-gauge ROMEX® in the third baseboard heater. Connect these wires directly, one each, to the two wires going to the heating element. Be sure all three heaters have the bare copper wire attached to the green screw on the metal frame of the heater.
Step 11
Strip the insulation back on the 10 gauge ROMEX® inside the main panel. Attach the black wire to one screw terminal on the two-pole circuit breaker. Connect the white wire to the other screw on the circuit breaker. Secure the bare copper wire to the rear ground bus bar located on the side of the main panel box. There will be other white wires and bare copper wires attached to this bus bar as well.
Step 12
Replace the main panel cover over the main panel box. Turn the main breaker switch back on. Turn the new 30-ampere circuit breaker on, to power the baseboard heaters. The new heaters should now be warming.
Video of the Day