Over time, a bathroom sink can start to look old and worn out. When a bathroom sink begins to look cracked and scuffed, it can quickly give the impression of a dirty bathroom — and no amount of cleaning can restore it to its former glory. These cracks are a particular feature of older or antique sinks, as the Bath Business explains.
Reglazing your bathroom sink at home could be the key to extending its life, giving a brand-new feel to your bathroom and saving you some money too. Not only that but reglazing an old porcelain sink can give you the opportunity to switch out colors for a new bathroom look at an affordable cost.
Video of the Day
Video of the Day
Safety Tips for Reglazing
Some of the chemicals you'll use in prepping your bathroom sink for reglazing can be quite harmful to the sink. It's very important to wear gloves when working with any harsh cleaning products, solvents or acids.
Sanding down your old glaze can also release many tiny particles into the air. These can be very irritating to the eyes and to the lungs, so wearing goggles and a safety mask is essential.
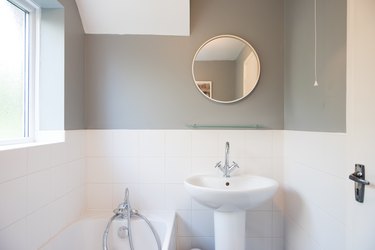
Prep Your Sink for Reglazing
The first step to a satisfactory at-home reglazing experience is in the prep work. A1 Reglazing claims this needs to start with a thorough deep cleaning of your sink. You can purchase specific cleaning products to ensure you get a deep cleanse. After you're sure the sink is free of grime and grease, you need to sand it down with 400- to 600-grit sandpaper to remove the old glaze.
You should also remove any silicone caulking with a solvent. This caulking will get in the way of your new glaze and affect how well it takes to the sink. You can recaulk these areas after you've applied your new glaze. You should scrape down your sink with an acid paste to remove any debris. You should also clean with a grease-removing cleanser one final time to ensure your sink is as clean and primed for glazing as possible.
You will also want to cover up any area where you don't want your new glaze to go. Using tape to cover taps and other sink fittings can be a quick and easy way of ensuring they stay clean and free of glaze. You should also cover the floor with newspaper to avoid any drips that can cause lasting damage.
Reglaze a Bathroom Sink
The first layer of glaze for your bathroom sink should be an epoxy primer. This will help your new glaze adhere properly and ensure it'll last a long time before needing to be touched up. You can use a small brush to apply this, as it doesn't need to be as even as your glaze — but you do want to make sure it covers everywhere, so take your time. Once this is painted on, you must leave adequate time for it to dry.
You can then go in with your glaze. It's usually recommended you apply this with a small roller to achieve an even finish without any streaking or patchiness. After you've allowed this adequate drying time, you'll be able to see whether or not you need another coat.
Once you're happy with the coverage of your glaze, you can then go in with your polyurethane topcoat. This will add a layer of shine to your finished sink, plus protect the glaze below to ensure it lasts longer. You should also recaulk your sink with a silicone caulk to seal any gaps.