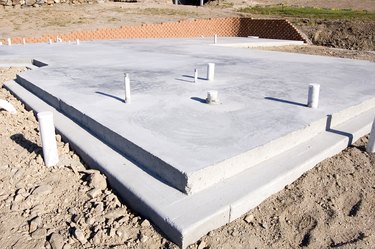
Many construction projects are now calling for welded wire mesh to be used in making concrete slabs, instead of rebar. Wire mesh allows for thinner slab pours, and protects against future cracking by providing a framework for the concrete to hold to. Reinforce wire mesh for concrete slabs so that it stays at the correct height during the pour, and so the mesh sheets remain together.
Things You'll Need
Slab runners (if needed)
Wire mesh
2 x 2-inch concrete bricks (if needed)
Video of the Day
How to Reinforce Concrete Slabs With Wire Mesh
Step 1: Align and Place Slab Runners
Lay down slab runners across your pour area to support the mesh. If you are doing a slab on grade (the ground) skip this step (you add the wire mesh supports last). Slab runners support wire mesh in elevated concrete pours, you make them from welded wire supports in varying heights. Each runner is 4-feet long, and you will lay them down, one butted against the other to form support lines through your pour. Place each line of runner 3 1/2 feet from the next line of runners.
Video of the Day
Step 2: Set the First Sheet of Wire Mesh
Lay your first sheet of mesh down on top of the slab runners (if you are working on a slab on grade simply lay the mesh on the ground). Begin in a corner making sure that you maintain the specified clearance for your project. Keep the metal away from the edge of a concrete pour. This prevents rust, from the metal in the concrete, from bleeding through to the exterior.
Step 3: Lay More Sheets of Mesh
Carry your next sheet of wire mesh over and rest it on the edge of the first sheet you put down 1 1/2 squares onto the first sheet. Welded wire mesh is welded in squares, and you want each sheet to overlap the other 1 1/2 squares. Adjust the second sheet so the edge overlapping the first sheet is straight and even, covering 1 1/2 squares of the first sheet.
Step 4: Tie Wire Mesh Together
Tie the sheets together. Use linesman pliers to make tie wire snap ties at both corners of the overlapping sheets of wire mesh and place at least one tie in the center of the overlap. Make sure that the ties join the two sheets together. Continue laying down your wire mesh and tying it together until your entire slab is covered.
Step 5: Prop Up the Mesh (as needed)
Raise the completed mesh grid to the correct height within the slab. If you have placed slab runners down you can skip this step as you already did this to begin the slab. For a 4-inch-thick slab, place 2 x 2-inch concrete bricks (called dobies) under the wire mesh every 4 feet to support the mesh.
Tip
Use a pair of bolt cutters to cut your wire mesh so it fits around any pipes or unusual box outs in the pour.
Warning
Always verify the specific clearances required for your slab on your project. Each project has its own specifications which may not be standard. If you do not first check, and instead install according to an industry standard and the specification is different, you will be responsible for the cost and labor of changing the installation.