If you have ever taught or helped with the science homework of elementary school children, you have probably assisted students in creating a diagram of the water cycle. A diagram illustrates the water cycle for kids acceptably, but creating a 3-D model allows for an experience that deepens their understanding. The model even serves as a working example of the water cycle. Not only will the kids understand the water cycle better from creating the model, but they will have a working model to observe.
- Clear plastic or glass container
- Shallow dish
- Soil or sand
- Craft stick
- Plastic wrap
- Small potted plant
- White or gray paint marker
- Small bowl
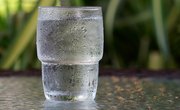
- Ice
- Small adjustable desk lamp
Add hot water to the reservoir to speed up the process and quickly demonstrate the water cycle. To label the model, write or print the words collection, evaporation, condensation, precipitation, sun, runoff and transpiration on labels, and attach them to the outside of the container in the appropriate locations.

Create the model in a clear, plastic or glass container with a cover, similar to an aquarium or terrarium. Use layers of plastic wrap as a cover if the container lacks one. Be sure there are no holes in the cover.

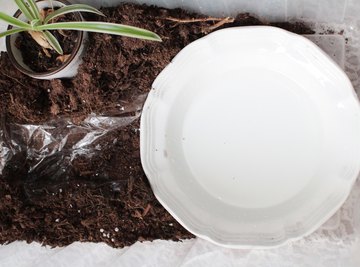
Place a shallow dish that covers approximately half the surface of the model container in the bottom of it to model the water collection part of the water cycle. Use a dish approximately 1 to 2 inches deep so it adequately serves as a source of evaporation. Fill the container with water only after completing the model.

Create ground in the container using soil or sand. Build a hill at the side of the reservoir by mounding up the soil or sand. Make the mound approximately half to three-quarters as tall as the container at its top and even with the reservoir at the bottom.

Water cycle models need to illustrate runoff as one of the ways that water collects during the cycle. Use a craft stick or your finger to create a small trench from the top of the mound of soil to its base, stopping the trench at the reservoir. Cover the trench with a thin strip of plastic wrap to facilitate water collection dripping from the cover, and then secure the plastic with some soil along the sides of the trench.

Place a very small plant in the soil to model transpiration, or the release of water vapor from plants. Leave the plant in a tiny pot or plant it directly in the soil.

Use a white or gray paint marker to draw cloud shapes that represent condensation on the cover or plastic wrap you will use to cover the model container. Allow the clouds to dry completely before using the model.

Place the cover on the model then sit a small bowl of ice on top of the clouds you drew on the cover. Be sure the ice-filled bowl rests on only a portion of the cover, and that its bottom is in direct contact with the cover so that water condenses on the underside of it.

Use the lamp to model the sun, the water cycle's heat source. Position the lamp so that the lamp shines through the lid and onto the water reservoir. Observe the inside of the container cover as the water evaporates, condenses and drips down as precipitation.
Things You'll Need
Tips
References
Tips
- Add hot water to the reservoir to speed up the process and quickly demonstrate the water cycle.
- To label the model, write or print the words collection, evaporation, condensation, precipitation, sun, runoff and transpiration on labels, and attach them to the outside of the container in the appropriate locations.
About the Author
Elizabeth Stover, an 18 year veteran teacher and author, has a Bachelor of Science in psychology from the University of Maryland with a minor in sociology/writing. Stover earned a masters degree in education curriculum and instruction from the University of Texas, Arlington and continues to work on a masters in Educational Leadership from University of North Texas. Stover was published by Creative Teaching Press with the books "Science Tub Topics" and "Math Tub Topics."
Photo Credits
Sarah Vantassel/Demand Media