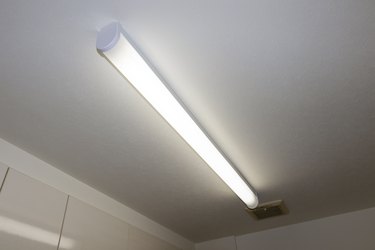
A fluorescent tube is a long, thin type of light that is attached to fittings on walls and ceilings. The tube lights up by exiting mercury atoms with electricity to produce visible light. If the light starts to flicker, only one end of the tube works, or the light doesn't turn on at all, you should replace the tube. The light's instruction manual will advise you on the size and type of replacement fluorescent tube required.
Clear the Area
Video of the Day
Clear the floor area and make sure all children and pets are out of the room. Turn off the light switch and allow the tube to cool for several minutes. If you're going to replace the entire fixture, also turn off the power at the breaker box. Test with a voltage tester to make sure there is no power to the fixture before you begin taking it apart.
Video of the Day
Remove the Tube
Place the ladder directly underneath the fluorescent bulb. Remove the fluorescent fixture's cover (if applicable) by gently pushing upward on the glass or plastic cover to release it from the bracket and then tilting it toward you. Some covers are held in place by clips and others by screws at each end of the support bracket; unscrew them with a suitable-size screwdriver.
Hold the edges of the tube gently and twist it toward you to release. Some models have tubes that require the end support brackets to be gently pulled apart in order to allow the bulb to come free. Be sure to never put pressure in the middle of the tube when replacing it so that it doesn't break.
Slide the new fluorescent tube back into the fitting by lining up the grooves on the end of the bulb and gently slotting it into place. Twist the tube to lock it in. Replace the glass cover. Switch on the main circuit and light switch.
Replace the Fixture
While you can remove and replace the ballast, in many cases, it is more cost effective to replace the entire light fixture. Remove the cover or light diffuser and fluorescent bulbs from the fixture. Take a picture of the wires and how they're attached to the fixture for reference. Detach the wires and remove the fixture from the ceiling.
If the new fixture doesn't align with the old, remove the cover, hold the fixture against the ceiling, and mark the mounting holes with a pencil or marker. Locate the ceiling joists with a stud finder. Use wood screws or if there are no joists, install toggle bolts to support the fixture.
Pull the wires through the knockout hole in the base of the fixture and then attach it to the ceiling. Match the wiring — black to black and white to white — and twist together with wire nuts. Attach the ground wire to the fixture and then install the new fluorescent tubes and the cover. Turn the breaker back on and turn the light on.
Dispose of the Tube Safely
Fluorescent lighting has a small amount of mercury in it, which can be toxic if someone is overexposed to it. Be sure to dispose of the broken light through a recycling program. While your local refuse company may require a small payment when you drop off the old tubes, you can be assured that they are disposed of properly to avoid contaminating the local environment.
When replacing the tube, if it breaks, quickly make sure that no one else is in the room. Turn off any heating or air conditioning in that room and open all of the doors and windows for at least 10 minutes for ventilation.
Carefully remove the broken materials and place them into a sealable bag. Then, clean any hard surface with several layers of damp paper towels or rags. Be sure to also dispose of that towel or rag in the sealable bag as well. Never vacuum up a broken fluorescent tube.