


Quicken is the most popular financial software package, on both the Windows and Mac platforms. It has far less competition as far as Mac users go, as second place Microsoft Money doesn't have a Mac version. Quicken, despite all of its bells and whistles, is a fairly user-friendly software package.
Buy Quicken for the Mac. You can get it most anywhere software is sold, or by downloading it from the Intuit Website. If you have a previous version, you'll be able to get an upgrade at a lower price than buying an entirely new copy.
Install it. Quicken is a similar install to all other Mac software. By double clicking on the icon (either on the CD or the download), you'll be prompted through a wizard that makes the install extremely easy.
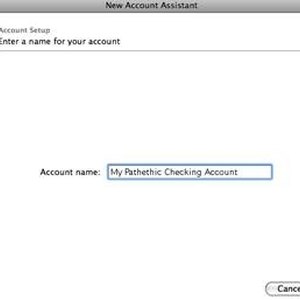
Launch Quicken. You will be prompted to enter your name. Then you will be asked to create accounts. Accounts are grouped in three categories: "Cash Flow," "Investments" and "Property & Debt." Create each new account when the New Account Assistant window opens.
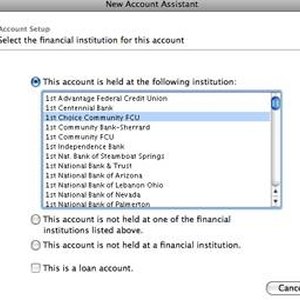
Harness the power of Quicken's online capabilities to help you auto fill your account information. Once you've established this connection, you'll be able to download information from your bank directly into your Quicken file.
While there is seemingly no limit to the functions that Quicken can accomplish, there are a few that are mandatory to know. These are Reconcile (select "Reconcile" under the Activities menu), "Update Security Prices" (under the Online menu), "Back Up" (under the File menu) and "Reports & Graphs" (under the Activities menu).

Set the preferences to your liking. This includes configuring the toolbar, custom categories, the auto-fill functions as well as the reports and graphs output.
Tips
Look for special offers that allow you to upgrade from earlier versions.
Warnings
Deleting an account in Quicken can't be undone. Don't forget to back up your data.
Tips
- Look for special offers that allow you to upgrade from earlier versions.
Warnings
- Deleting an account in Quicken can't be undone. Don't forget to back up your data.
Writer Bio
Christopher Capelle is a freelance copywriter with over two decades of experience. Subjects of his writing include the business and technology fields, consumer products and home repair/improvement. He graduated from The University of Connecticut and earned a master's degree in journalism from Iona College.