Iron-on patches on hockey jerseys often become warped or bubbled after many washings. The jersey itself becomes warped or shrinks, and little bubbles appear in the patches. The bubbles are places where the patch has pulled away from the jersey itself, and the patch no longer lies flush against the material. Removing bubbling from hockey jerseys takes some patience but is not a difficult process. An iron and basic sewing abilities are all that are needed.
Remove the Bubbles
Remove any stitching along the edge of the patch. Iron-on patches are often stitched to the jersey around the edges to keep them from peeling off. Use a seam ripper to carefully remove any stitching if the patch is sewn as well as ironed in place.
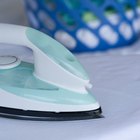
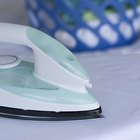
Heat the jersey with a warm iron. Use a press cloth, such as a washcloth, to protect the jersey. Also make sure the iron is not set too hot for the jersey material. Put the press cloth on top of the area with the patch and iron it to warm the patch and loosen the glue. Be careful not to leave the iron stationary too long or the material may get burned.
Slowly peel the patch away from the jersey in the areas where there is bubbling. You may have to alternate between ironing and peeling to remove as much of the patch as needed.
Reposition the Patch
If there is not enough glue remaining on the patch, add a thin layer of fabric glue. This will help the patch re-adhere to the jersey.
Reposition the part of the patch that has been peeled back. Start at the innermost area of the patch and apply pressure, smoothing the patch outward to make sure it is flat in all areas.
Maintain pressure on the patch until it has cooled and the glue adheres to the hockey jersey. Allow the glue to dry fully.
Stitch around the edge of the patch to prevent peeling. Use a simple straight stitch around the entire patch, about 1/8 inch from the edge.
Related Articles

How to Remove the Vinyl Adhesive of a ...

How to Attach Cub Scout Patches

How to Use Iron-On Patches on Jeans

How to Delint a Sweater
How to Patch Small Holes in Polar Fleece

How to Take Out Wrinkles From a Merino ...
How to Get Fuzz Out of Polyester
How to Make Iron on Patches

How to Remove Iron-On Hemming Tape

How to Fix a Cowboy Straw Hat
How to Get Rid of Wrinkles on an NFL ...

How to Fix Holes in Jeans Without Sewing

How to Fold a Jersey
How to Iron on Awana Patches

How to Get Pills out of Jeans
How to Shrink a Baseball Jersey
How to Get Wrinkles Out of Rubber
How to Remove Wrinkles From Polyester ...
How to Reattach Plastic Lettering to a ...

How to Get Iron on Letters Off
Writer Bio
Elizabeth Dolgner is a freelance writer with over a decade of experience. Dolgner now works in the motorsports industry, writing for "2Wheel Tuner," "Roadracing World," "Grassroots Motorsports," and other publications. She is also an author and has published two books. Dolgner holds a Bachelor of Arts in Communications from Florida Atlantic University.